ELITE HAND CONTROLLER MANUAL
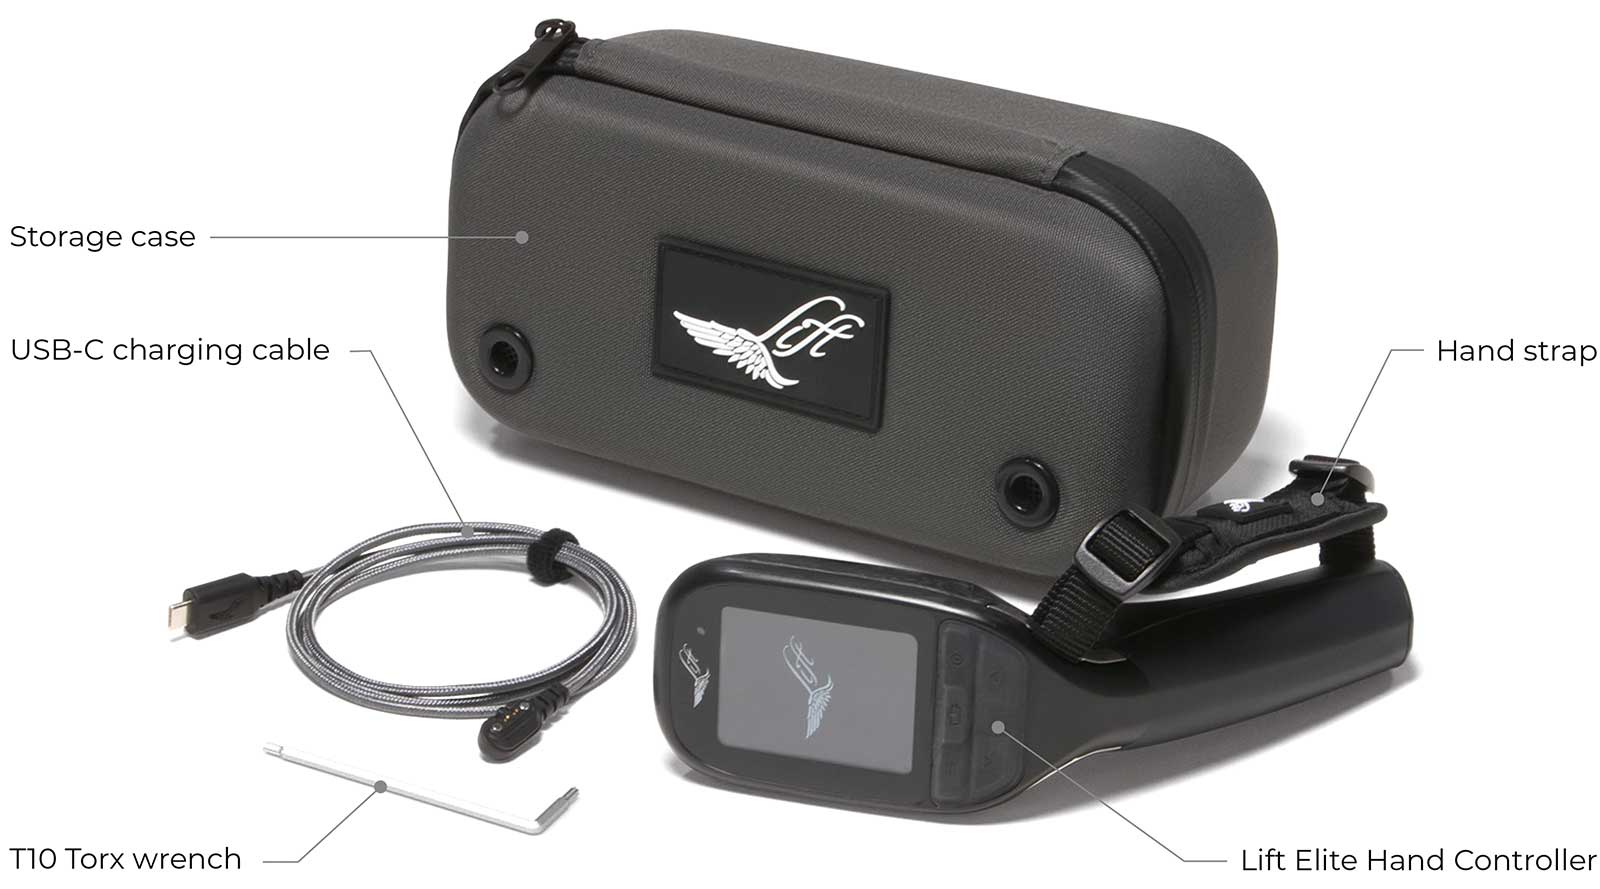
COMPONENTS
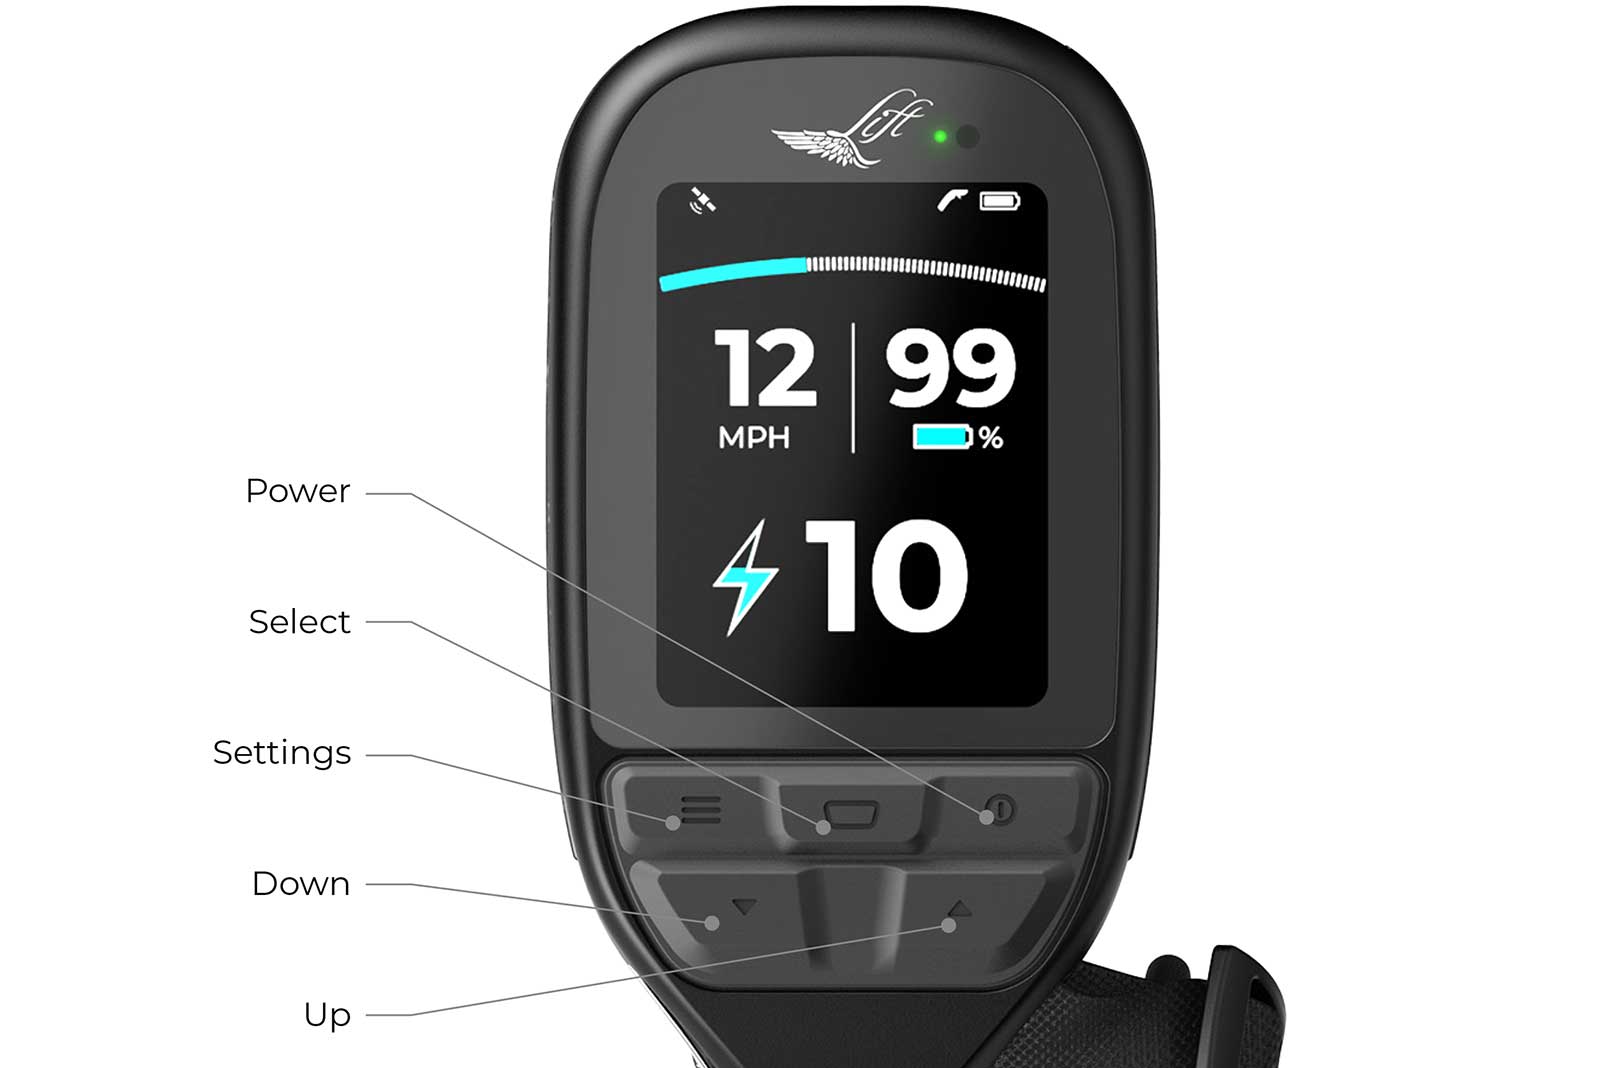
CONTROLS
CHARGING
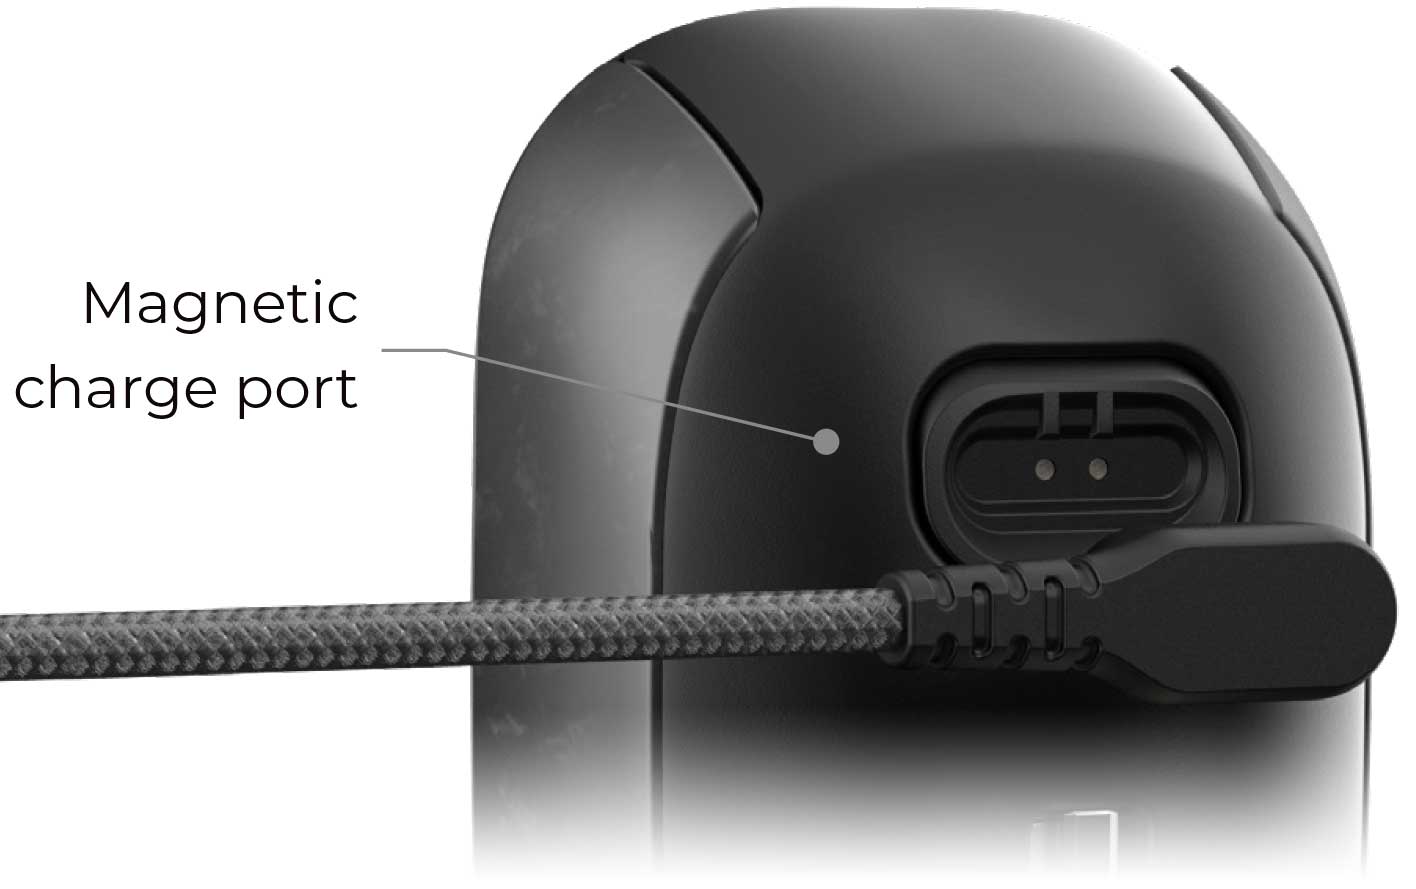
To charge your Elite Hand Controller (EHC), use the included USB-C cable. Attach the magnetic USB-C charging cable to the charge port found on the underside of the hand controller above the trigger. Ensure the magnetic charge port is clean and clear of any particles or debris that may prevent the cable from connecting properly. Plug the charging cable into a USB-C power source.

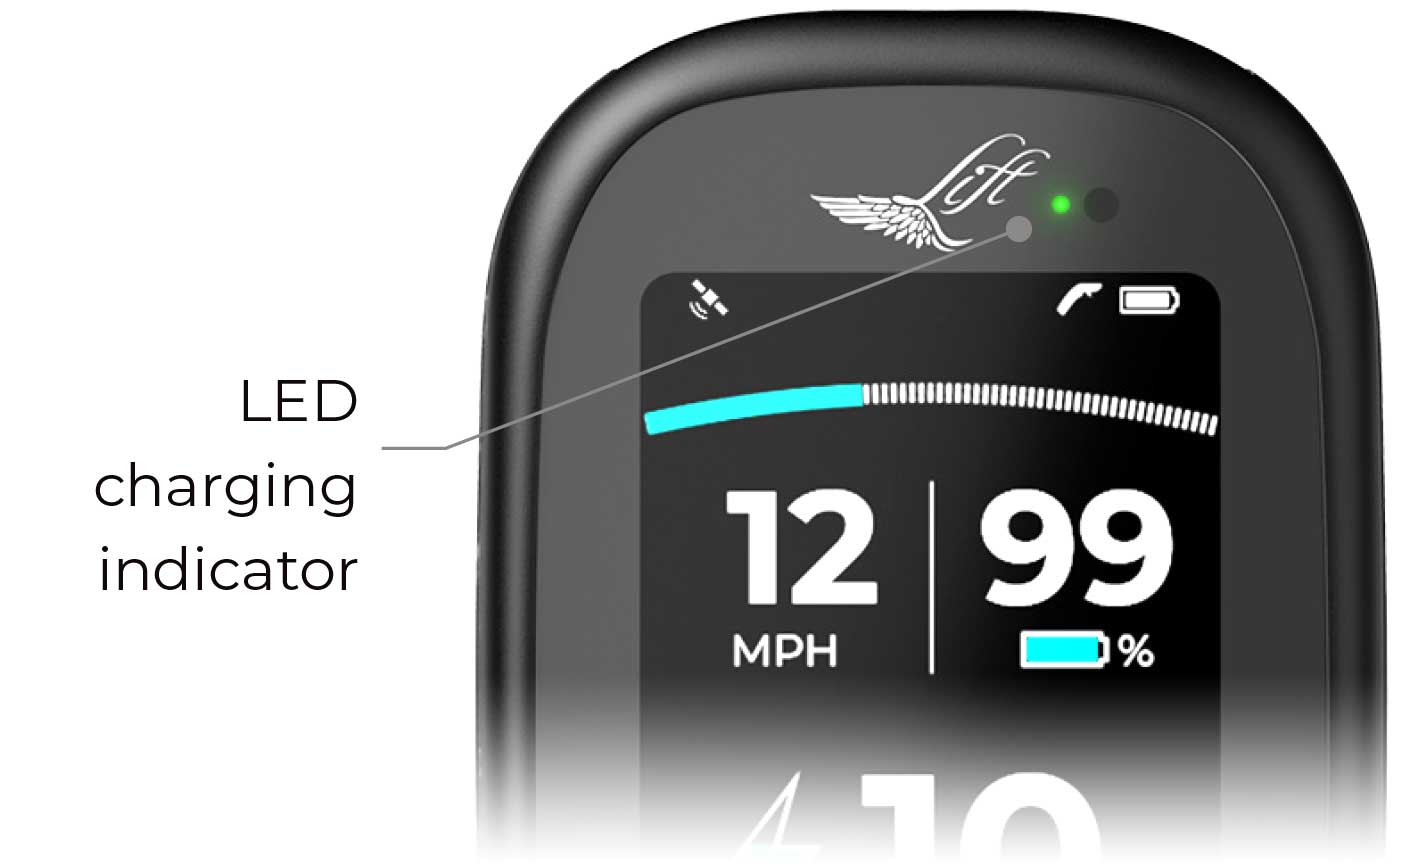
While the hand controller is charging, the green LED above the display screen, next to the Lift logo, will blink. We recommend fully charging your hand controller before riding, which can take up to two hours, depending on its starting charge level. A fully charged EHC will last multiple sessions.
NOTE: The hand controller will charge faster if it is turned off during the charging process. When the hand controller battery is fully charged, the green charging LED will remain lit until the charging cable is removed. Charging may take up to four hours to charge to 100% state of charge (SOC).
POWERING ON
Once your EHC is fully charged, turn it on by pressing the power button. The Lift logo will appear on the screen during power up.
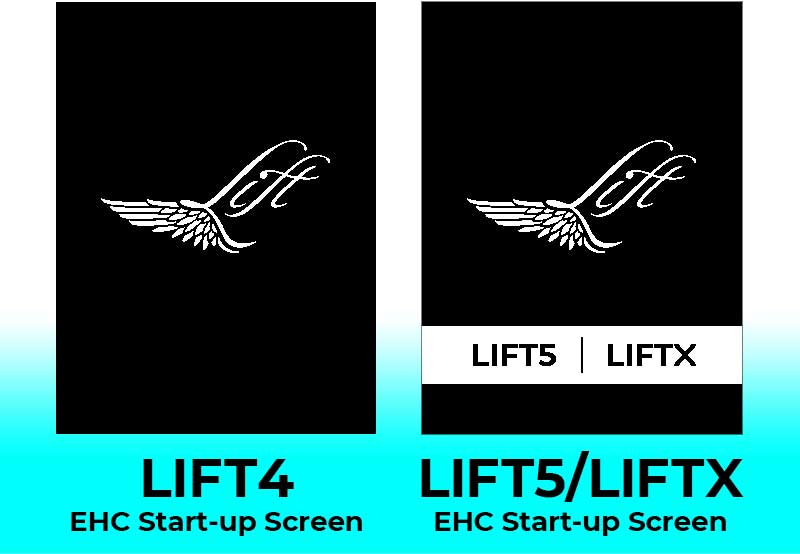
NOTE: The start-up screen displayed will depend on the version of EHC you have. Refer to screens.
COMPATIBILITY: LIFT4 EHCs are only compatible with LIFT4 (and previous generation) eFoils. LIFT5/LIFTX EHCs are only compatible with LIFT5 and LIFTX eFoils.
If the hand controller has not previously been paired with an eFoil, the EHC will initiate pairing mode. Pairing mode is indicated on the EHC screen with a Bluetooth icon. To continue the pairing process, please refer to the “Pairing” section of this user guide.

NOTE: The hand controller will turn off after three minutes of inactivity.
UPDATING FIRMWARE

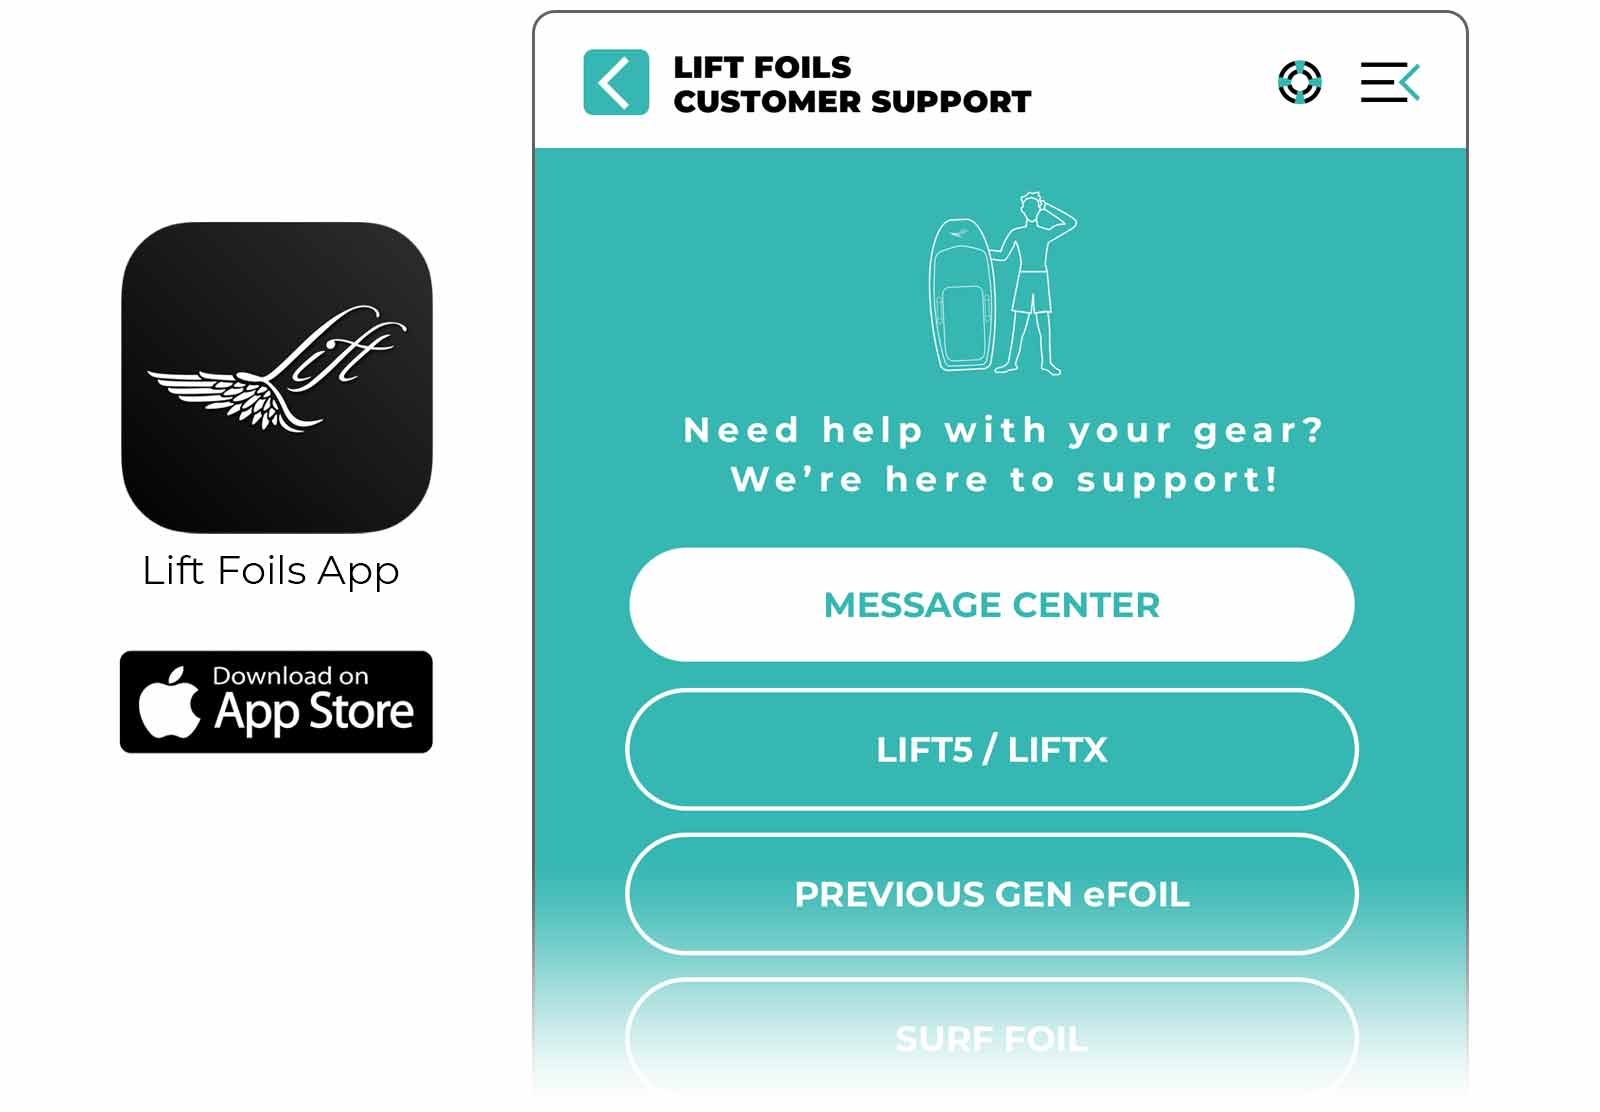
Prior to using your EHC, download the Lift Foils app onto your mobile device. The app provides easy, step-by-step instructions to connect your EHC and update it to the latest firmware.
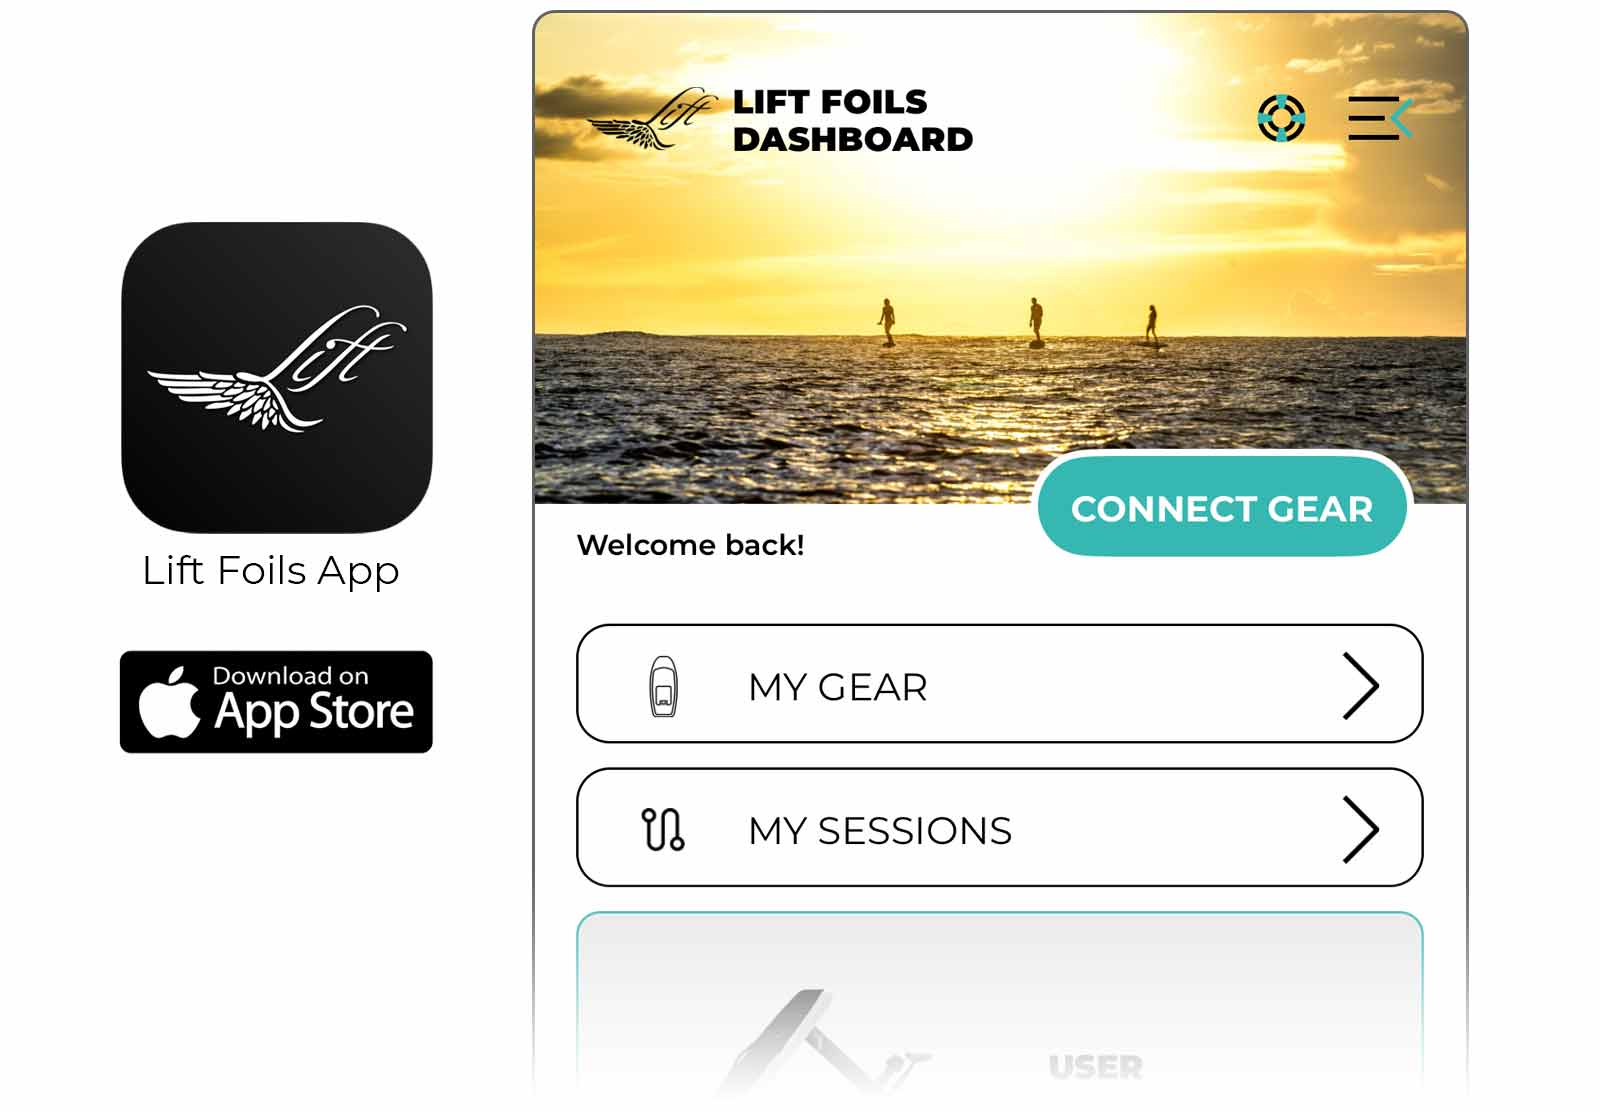
Within the Lift Foils App, tap CONNECT GEAR to connect to your Elite Hand Controller to the app. Follow the step-by-step instructions within the app to update your EHC. Once the hand controller is connected, the app will check for updates, and if needed, update the controller’s firmware automatically.

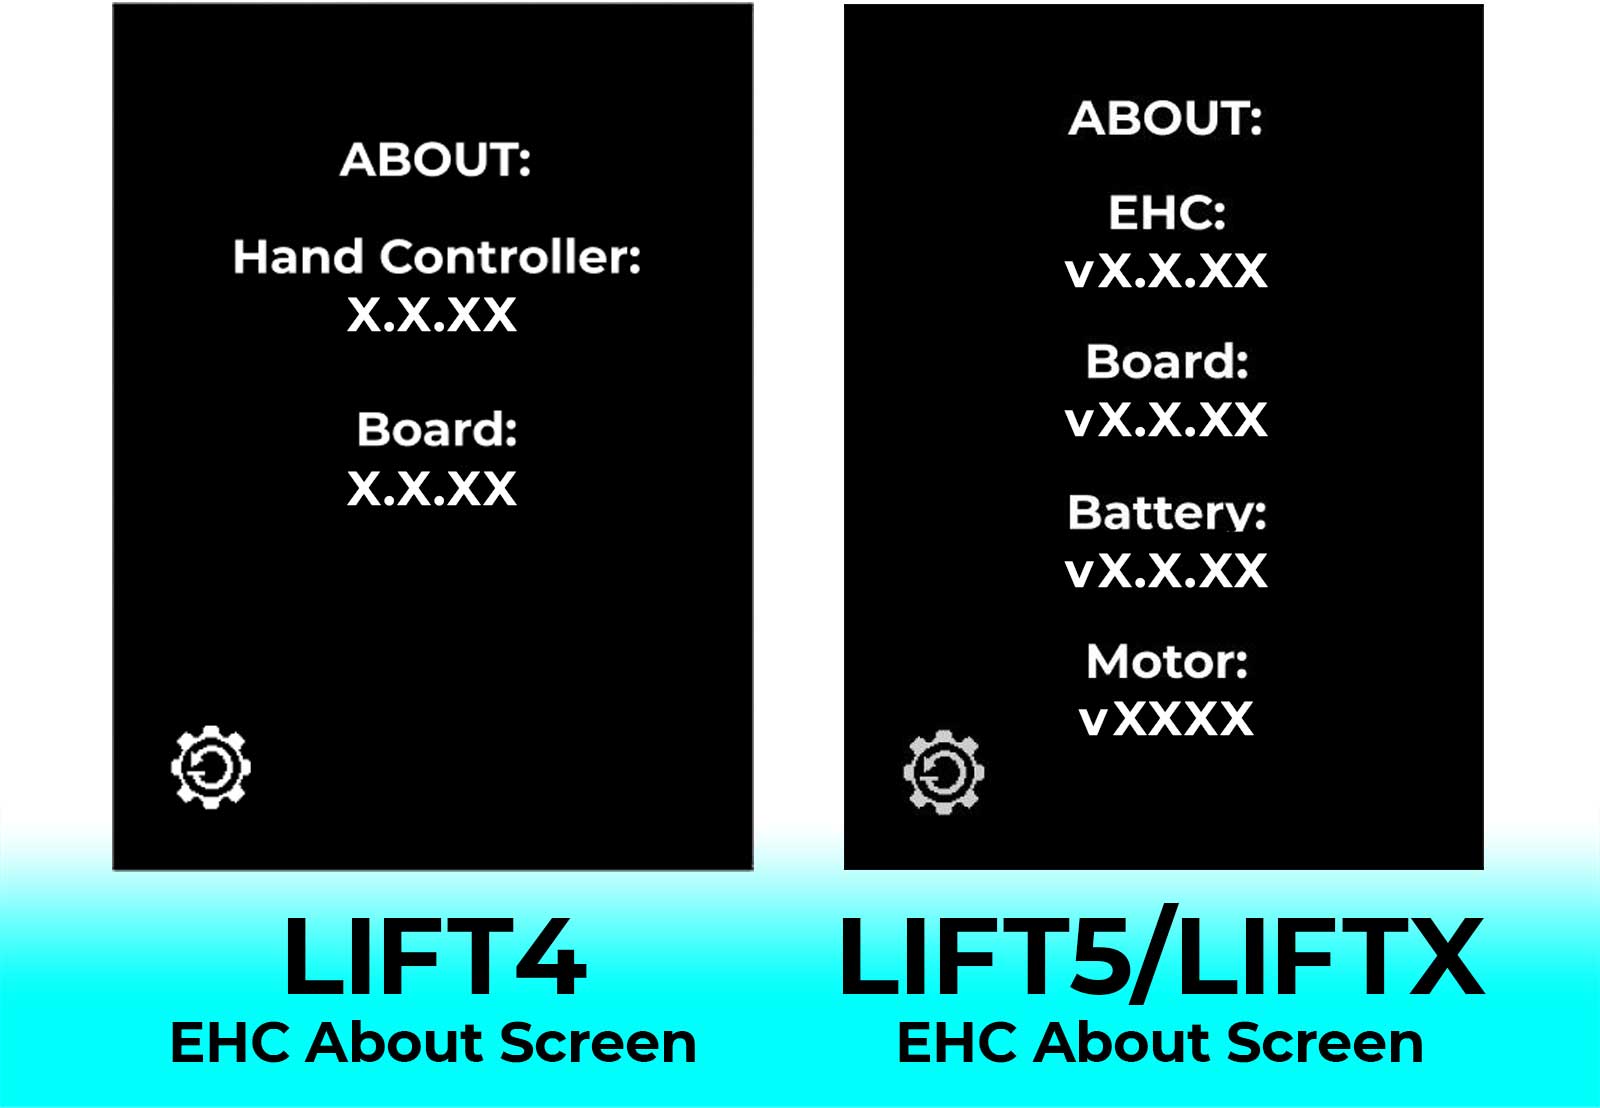
NOTE: You can review the current firmware version of your EHC (and other eFoil components) on the About screen, which is accessed through the Settings button.
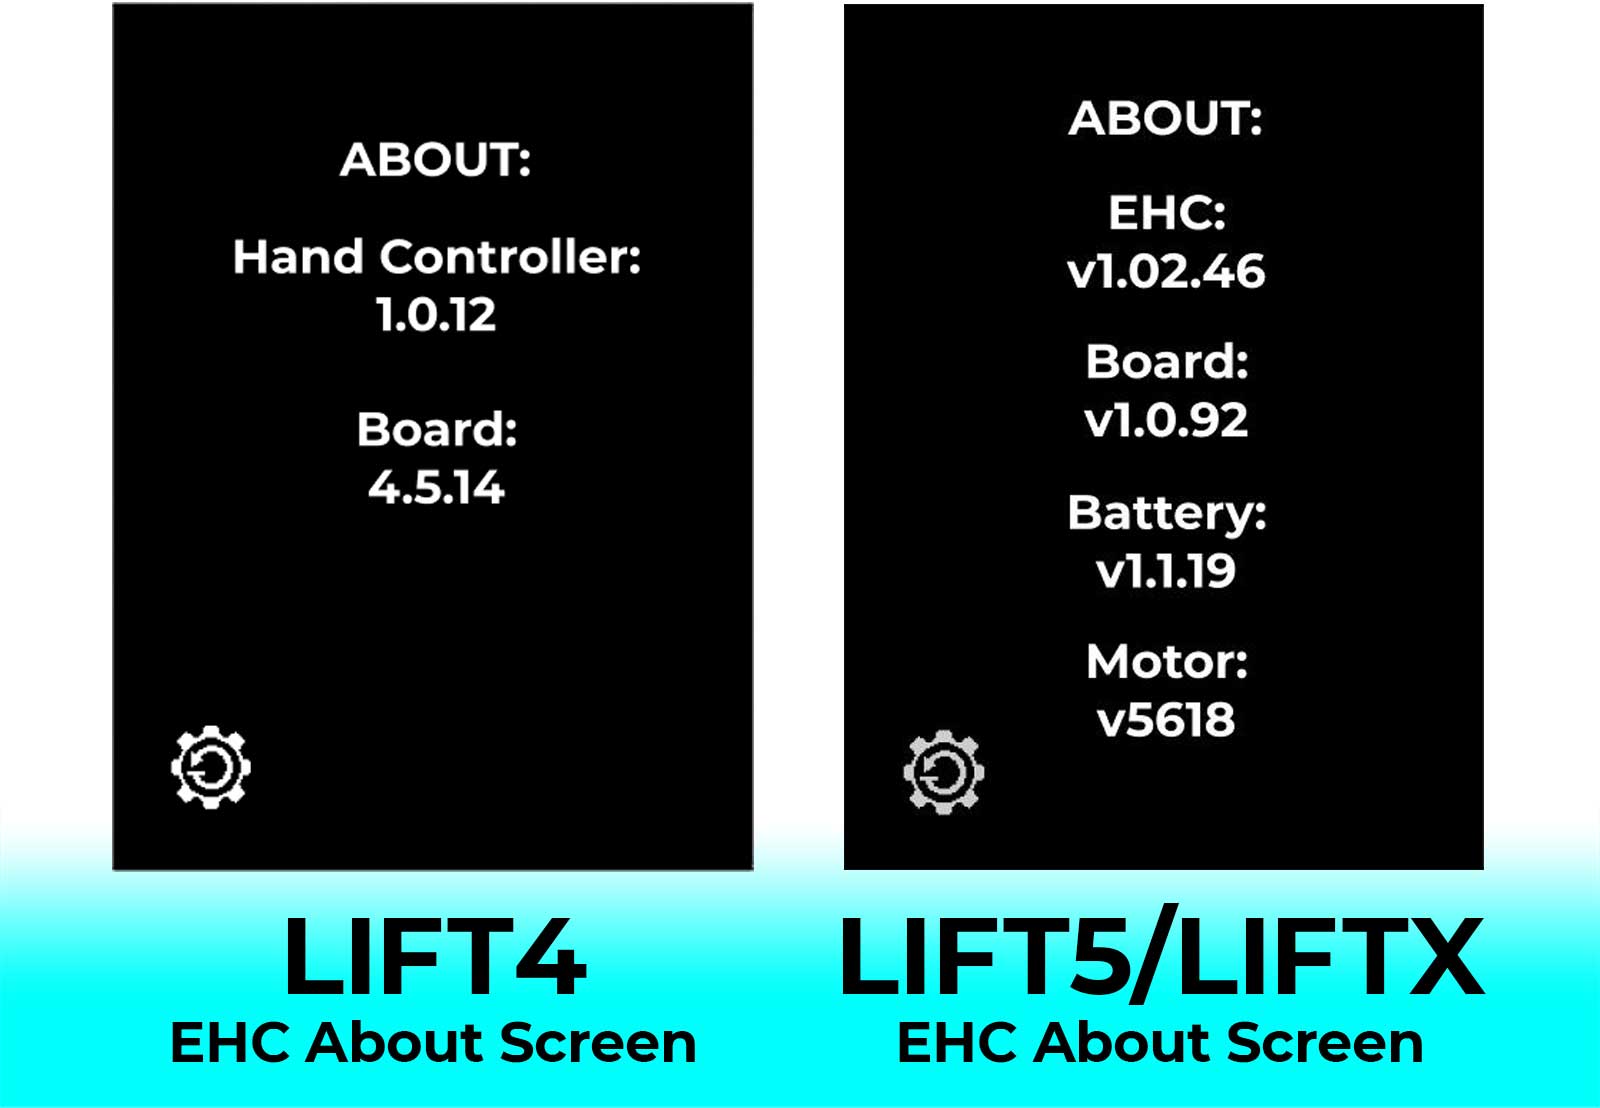
NOTE: The firmware versions displayed in the image above represent the current versions. The firmware on your EHC should match these versions. If your EHC is displaying older versions of firmware for any component, update the firmware for each component before proceeding, checking to make sure your firmware matches the version displayed above.
PAIRING THE CONTROLLER TO THE LIFT eFOIL
In order for the EHC to power your eFoil, you need to pair the components via Bluetooth. You will need your EHC and assembled eFoil to complete the pairing process.
The specific pairing process is the same for a LIFT5 and LIFTX. The LIFT4 (or previous generation Lift eFoil) is different. Both are explained below.
EHC Pairing Process for LIFT5/LIFTX EHCs and LIFT5 and LIFTX eFoils:
With the battery installed into the board, power on the battery. Four solid blue LEDs indicate the battery and board are connected, and the final LED flashing blue, indicating it’s searching via Bluetooth for the hand controller.

Next, power on the EHC by pressing the power button for 3 seconds. There are two methods of initiating pairing mode depending if an EHC has been paired previously:
- Start-Up Pairing Mode: If the hand controller has not previously been paired with an eFoil, the EHC will initiate pairing mode. Pairing mode is indicated on the EHC screen with a Bluetooth icon.
- Pairing Mode Through Settings Menu: If you are attempting to pair to an eFoil and the EHC does not display the “Attempting to Pair” screen upon startup, you can initiate pairing using the Settings menu. Press the Settings button on your EHC, and then select the “Board Pairing” icon to manually begin the pairing process. You may also need to access this method of pairing if you want to pair a previously paired EHC to another board.
Once the board is powered on and the EHC is in pairing mode, position the controller close to the back of your board. Place it just behind the battery, as shown below, for about 10 seconds to establish a connection between the board and controller.
You will notice the final (fifth) LED on your battery flashing faster as the EHC is positioned closer to the correct pairing area on the board. The LED on the battery will turn solid once the EHC is paired.

There are multiple visual indicators to confirm the EHC successfully paired with the eFoil:
- The final (fifth) LED on the battery will be solid blue.

- A green checkmark will be displayed on the EHC screen.
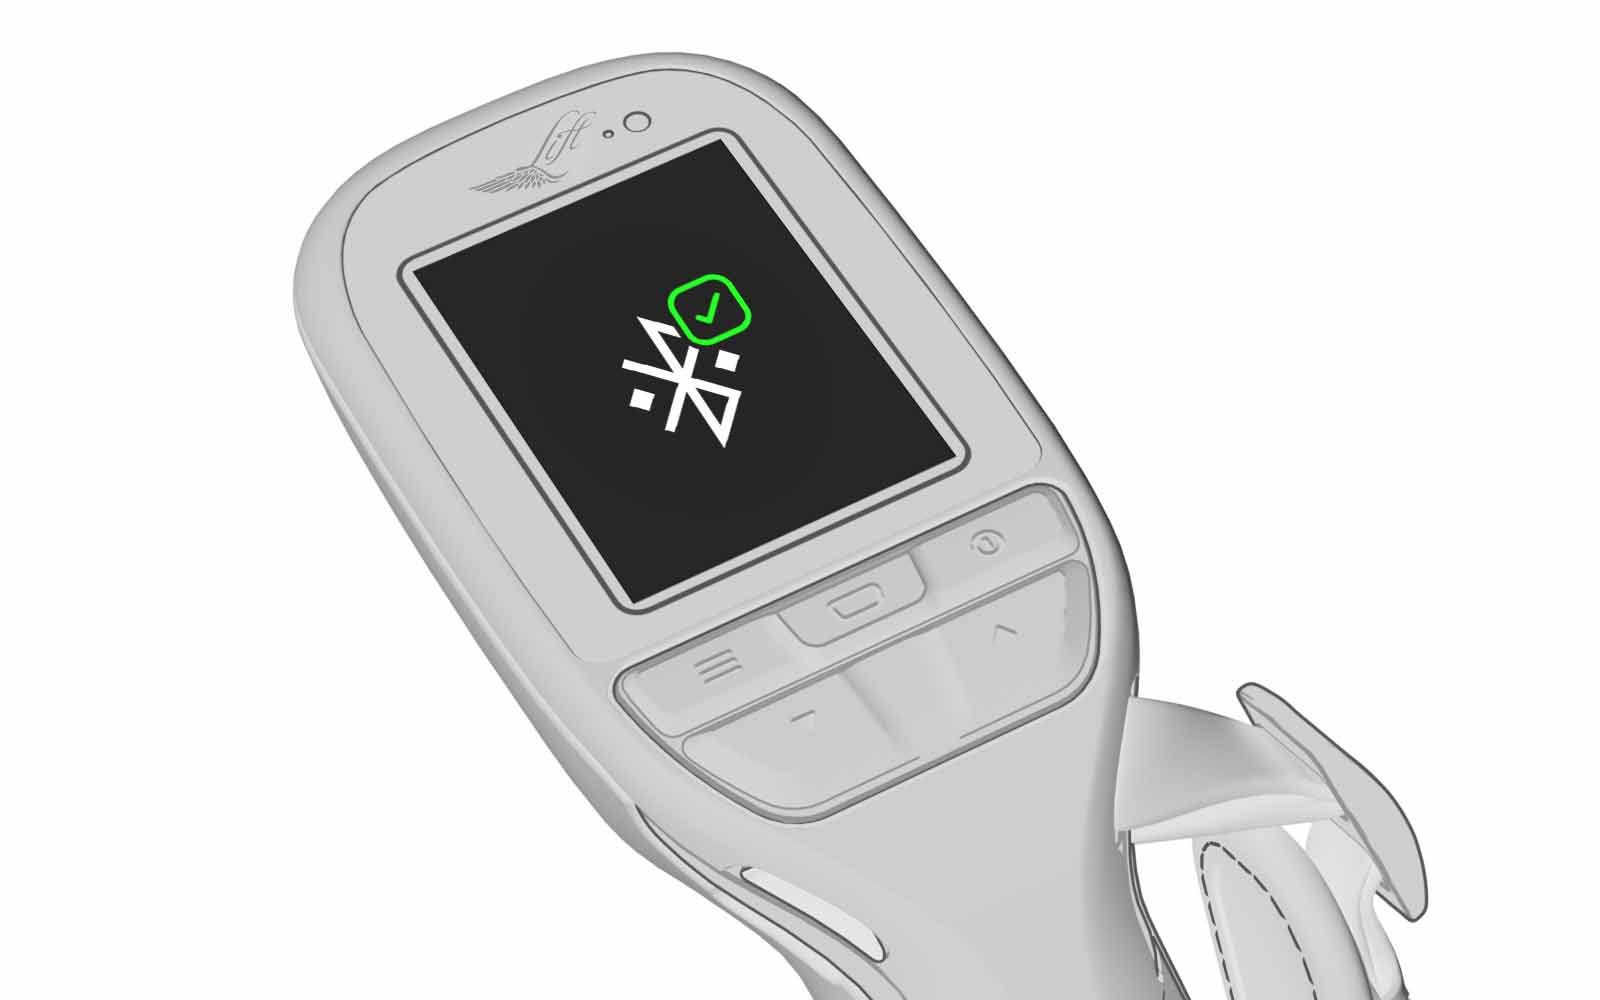
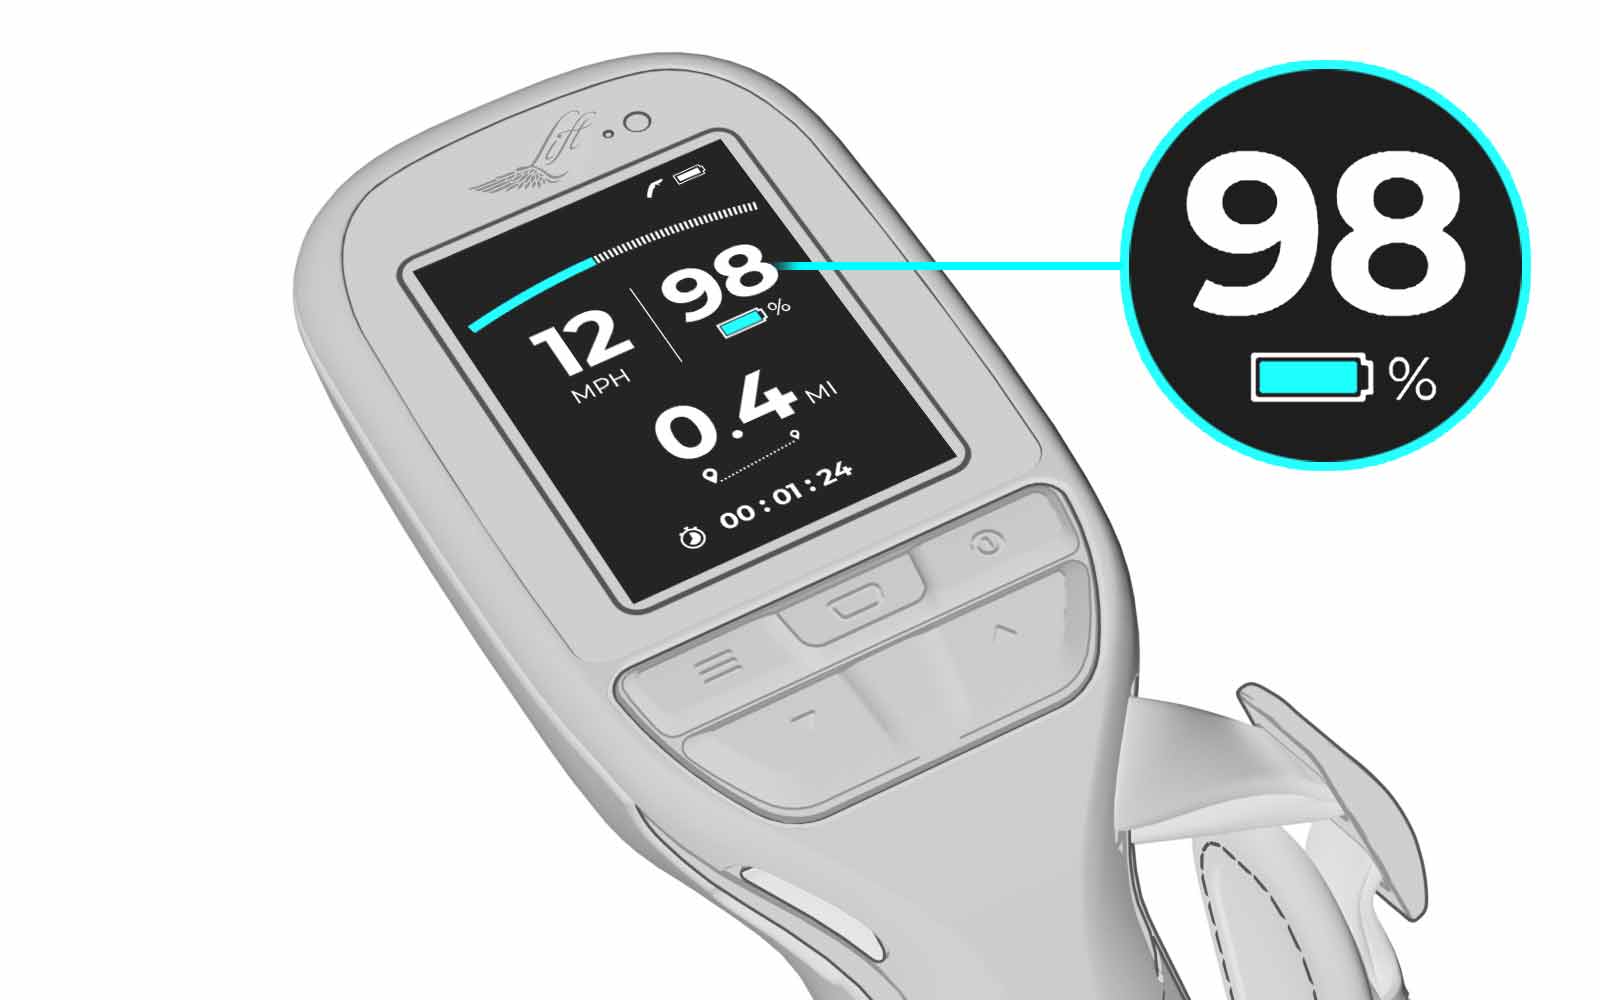
- After receiving the green checkmark and successful pairing, the hand controller will change to display Home Screen 1, displaying the eFoil battery’s state of charge in the upper right area of the screen.
EHC Pairing Process for LIFT4 EHCs and LIFT4 (and previous generation) eFoils
- Ensure the hand controller and eFoil are both turned off.
- Turn on the eBox by pressing the Power button.
- Place the eBox into pairing mode by pressing and holding the Relay button for three seconds.
- Power on the hand controller. It will start up and then initiate the auto-pairing process as indicated by the ‘Attempting to Pair’ screen.
- Finally, the ‘Paired with Board’ screen will appear, indicating the hand controller is connected to the eFoil.
If the pairing attempt was unsuccessful, the EHC will display the “Unable to Pair” screen. If this screen is displaying on the EHC, restart the pairing process and try again.
Once paired, the eFoil is live, and the hand controller will power the motor. You can confirm this by carefully and gently engaging the hand controller trigger. If paired, the propeller will begin to spin. Only perform this action when you are safe to do.
And that’s it! Your eFoil is ready to ride.
When you power off either the board or and hand controller, the components will remain tethered. This means they will reconnect automatically when you power them on, without having to repeat the Bluetooth pairing process.
Conversely, if you need to pair this hand controller to a different board, you will need to perform all the steps of the pairing process to pair with that board.
INSTALLING THE HAND STRAP
While you can use the hand controller without it, we strongly recommend installing the hand strap prior to using the hand controller.
It’s best to correctly fit the hand strap to your hand before heading out on the water.
Thread the strap through the upper and lower hand strap anchors found on the right and left side of the hand controller. Choose which side is best depending on whether you are left or right handed.
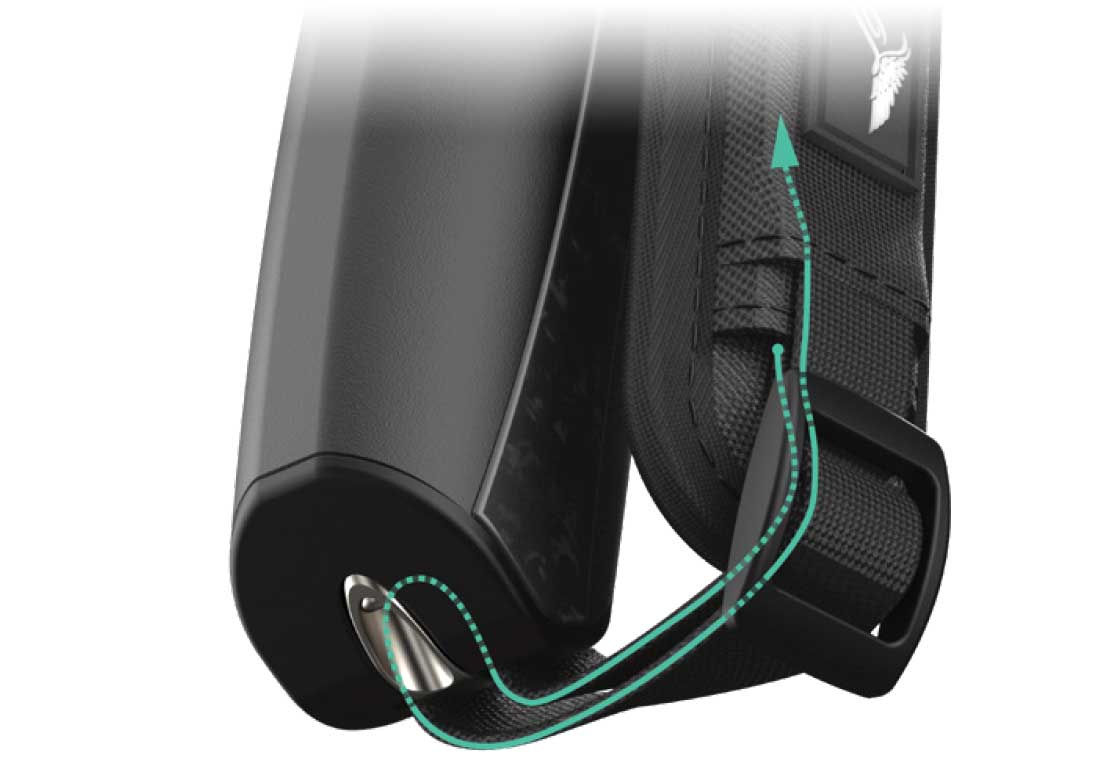
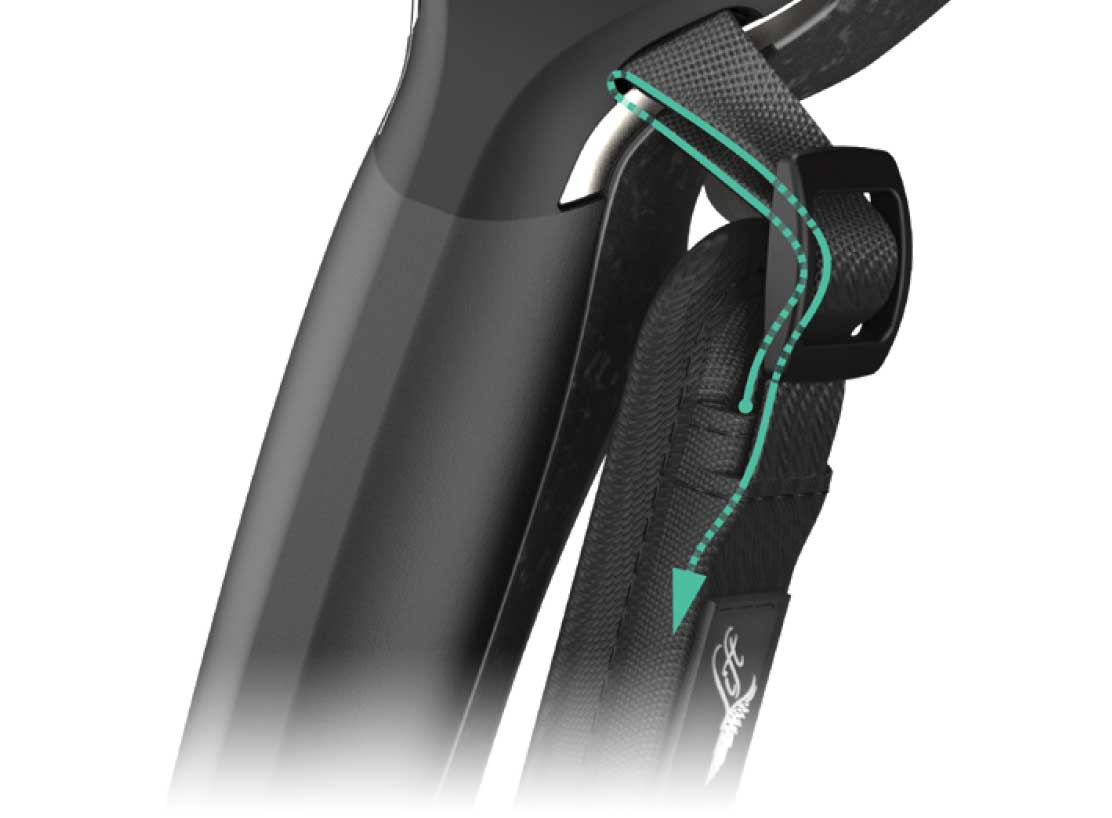
Thread the strap ends through the sliders. Pull the straps through to adjust to the appropriate tightness to best fit your hand. Tuck any loose ends into the pockets of the fabric panel.
ADJUSTING THE TRIGGER POSITION
You can adjust the position of the trigger for comfortable use. To adjust the trigger, place the T10 Torx wrench into the trigger bolt and loosen by turning counterclockwise. Once loosened, slide the trigger along its rail to the desired location. Tighten the bolt by turning the wrench clockwise. Do not overtighten.

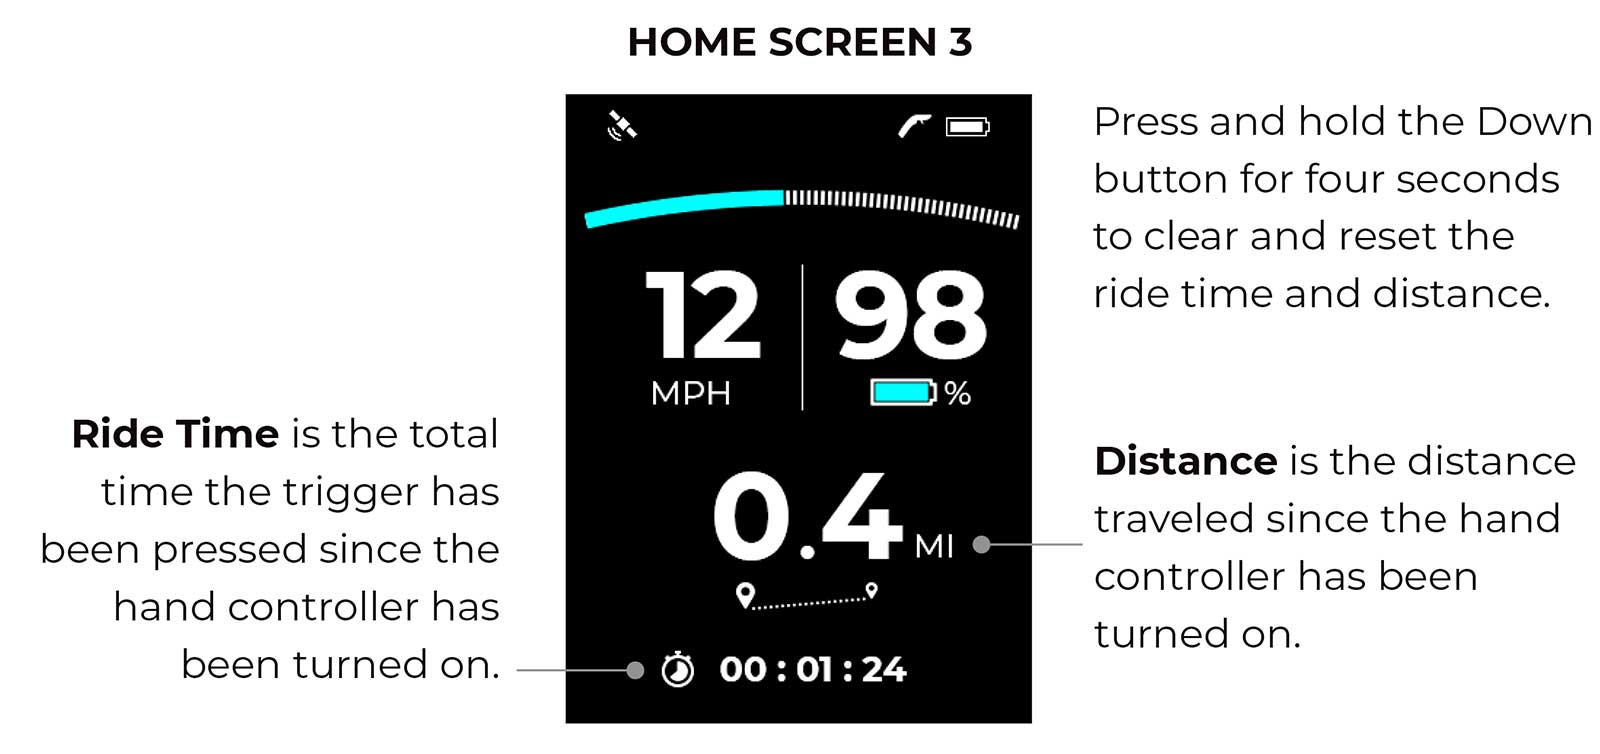
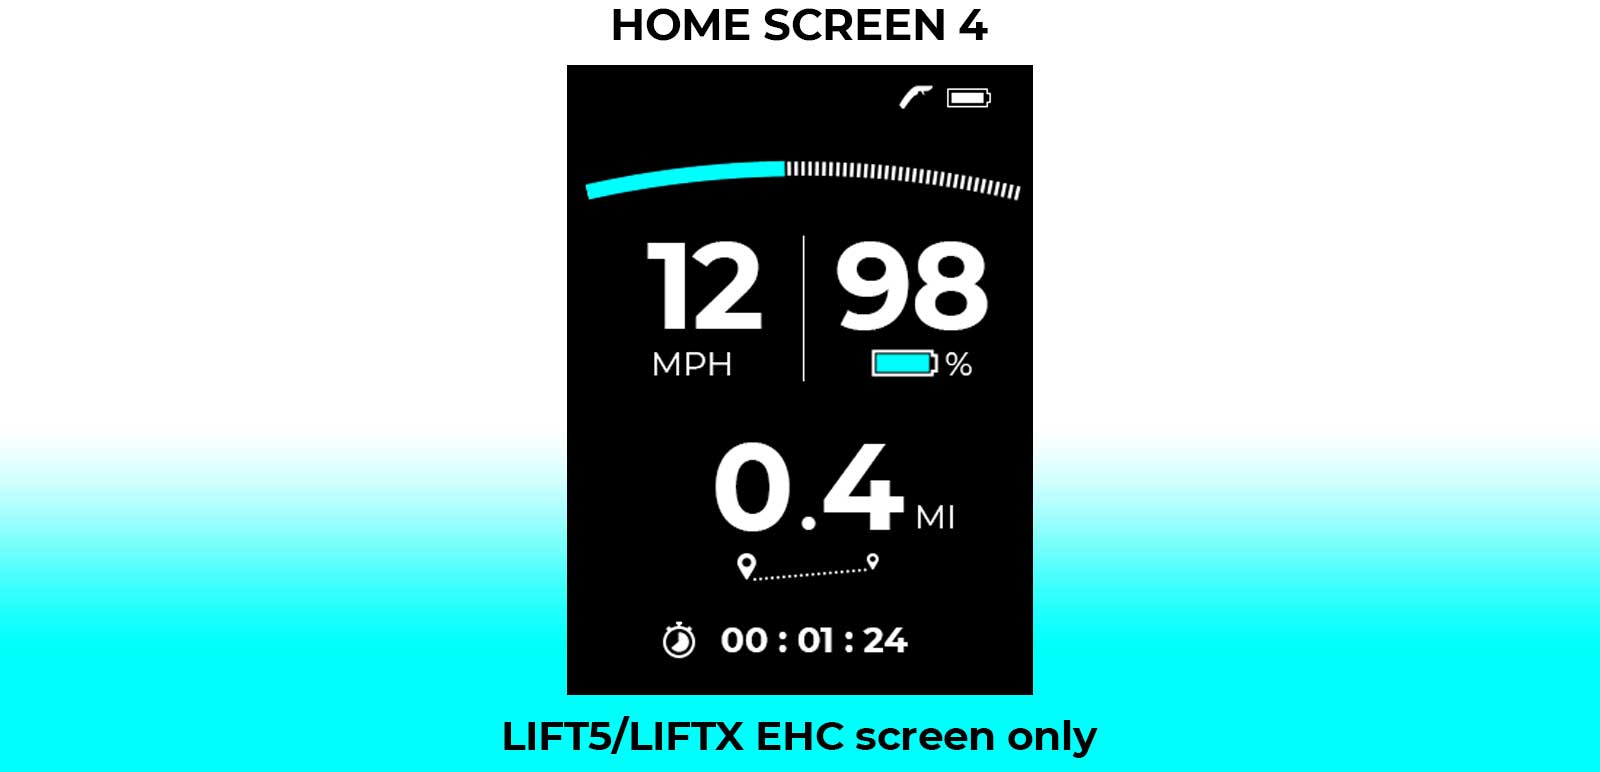
HOME SCREENS
Press Select to toggle between the Home Screens. Press the up or down arrow controls while displaying Home Screen 1 to change the power level.
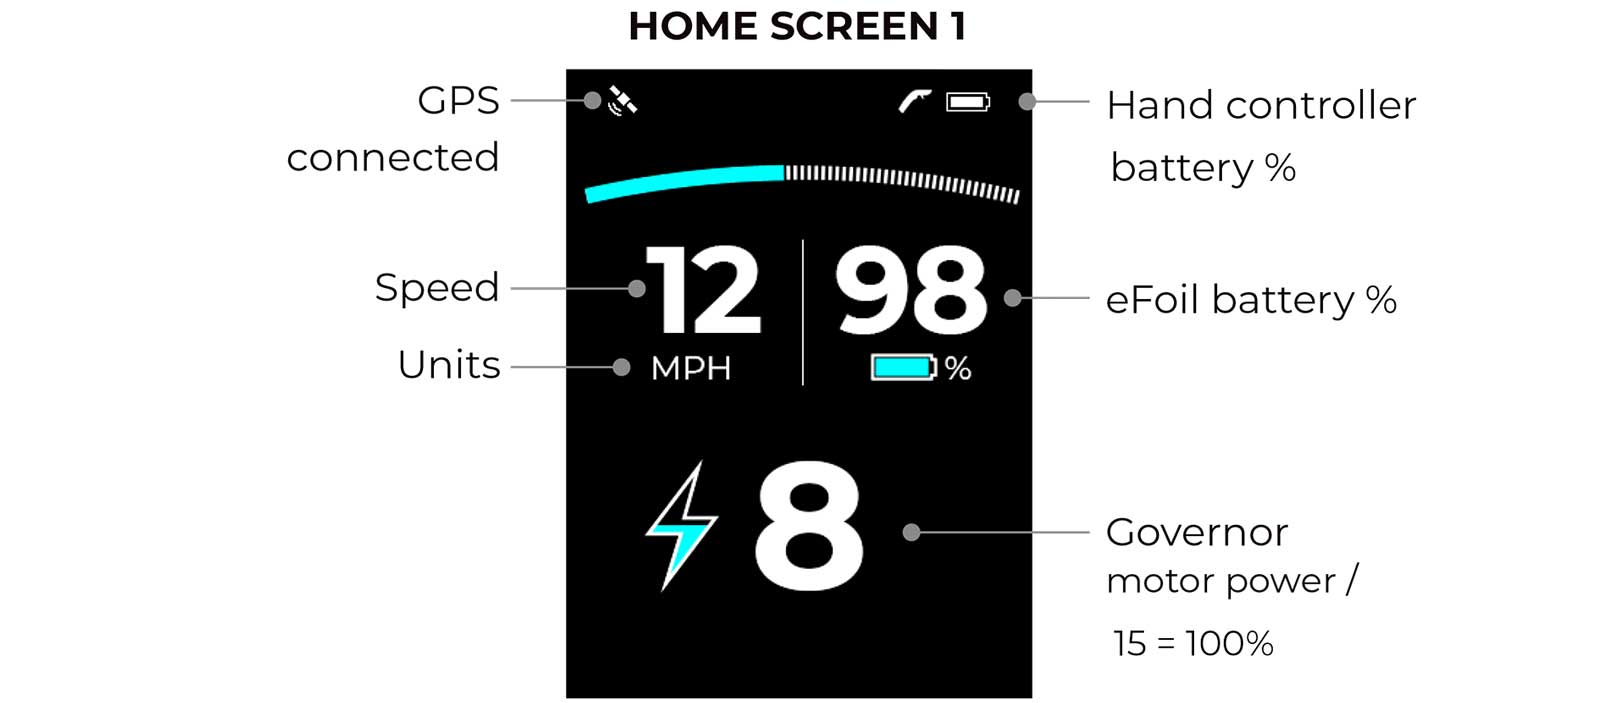
NOTE: On initial connection, speed and distance functionality may take up to 20 minutes to function as the GPS signal is acquired. Once GPS signal is acquired, the GPS icon will appear.
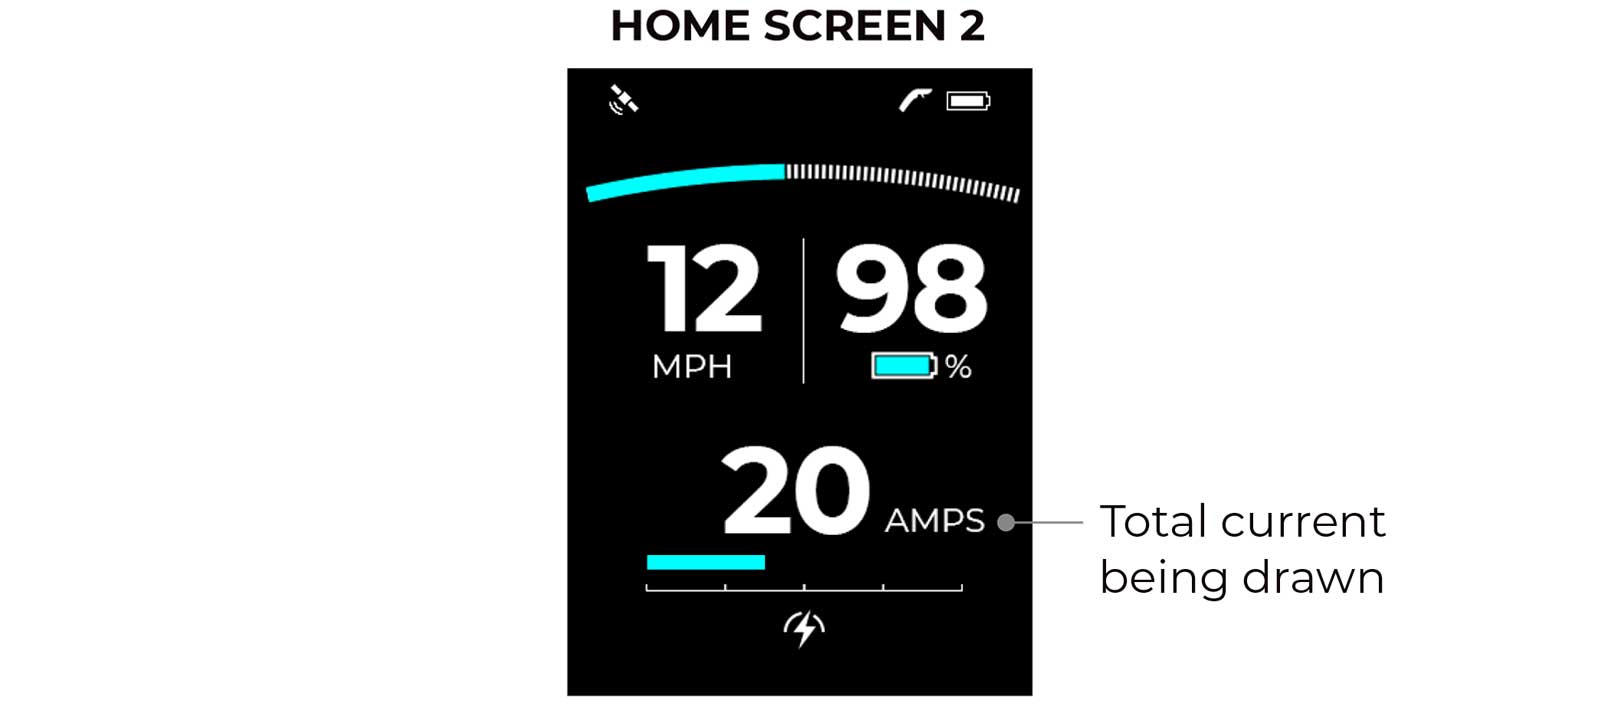
NOTE: While on Home Screens 2 and 3, use the up and down arrows to easily adjust the power levels, automatically taking you back to Home Screen 1.
NOTE: While on Home Screen 3, press and hold the down arrow to reset the ride distance tracker to zero.
AUXILIARY SCREENS
While in any Home Screen, press and hold Select for one second to display the Auxiliary Screens. To return to a Home Screen, repeat the same process by pressing and holding Select for one second.
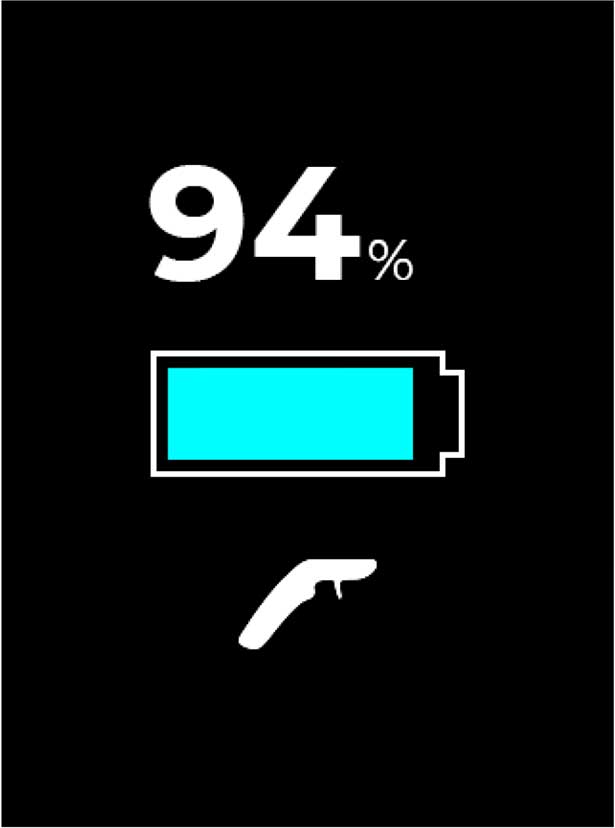
AUXILIARY SCREEN 1
Hand Controller Battery Charge: This screen displays the hand controller’s remaining battery life.
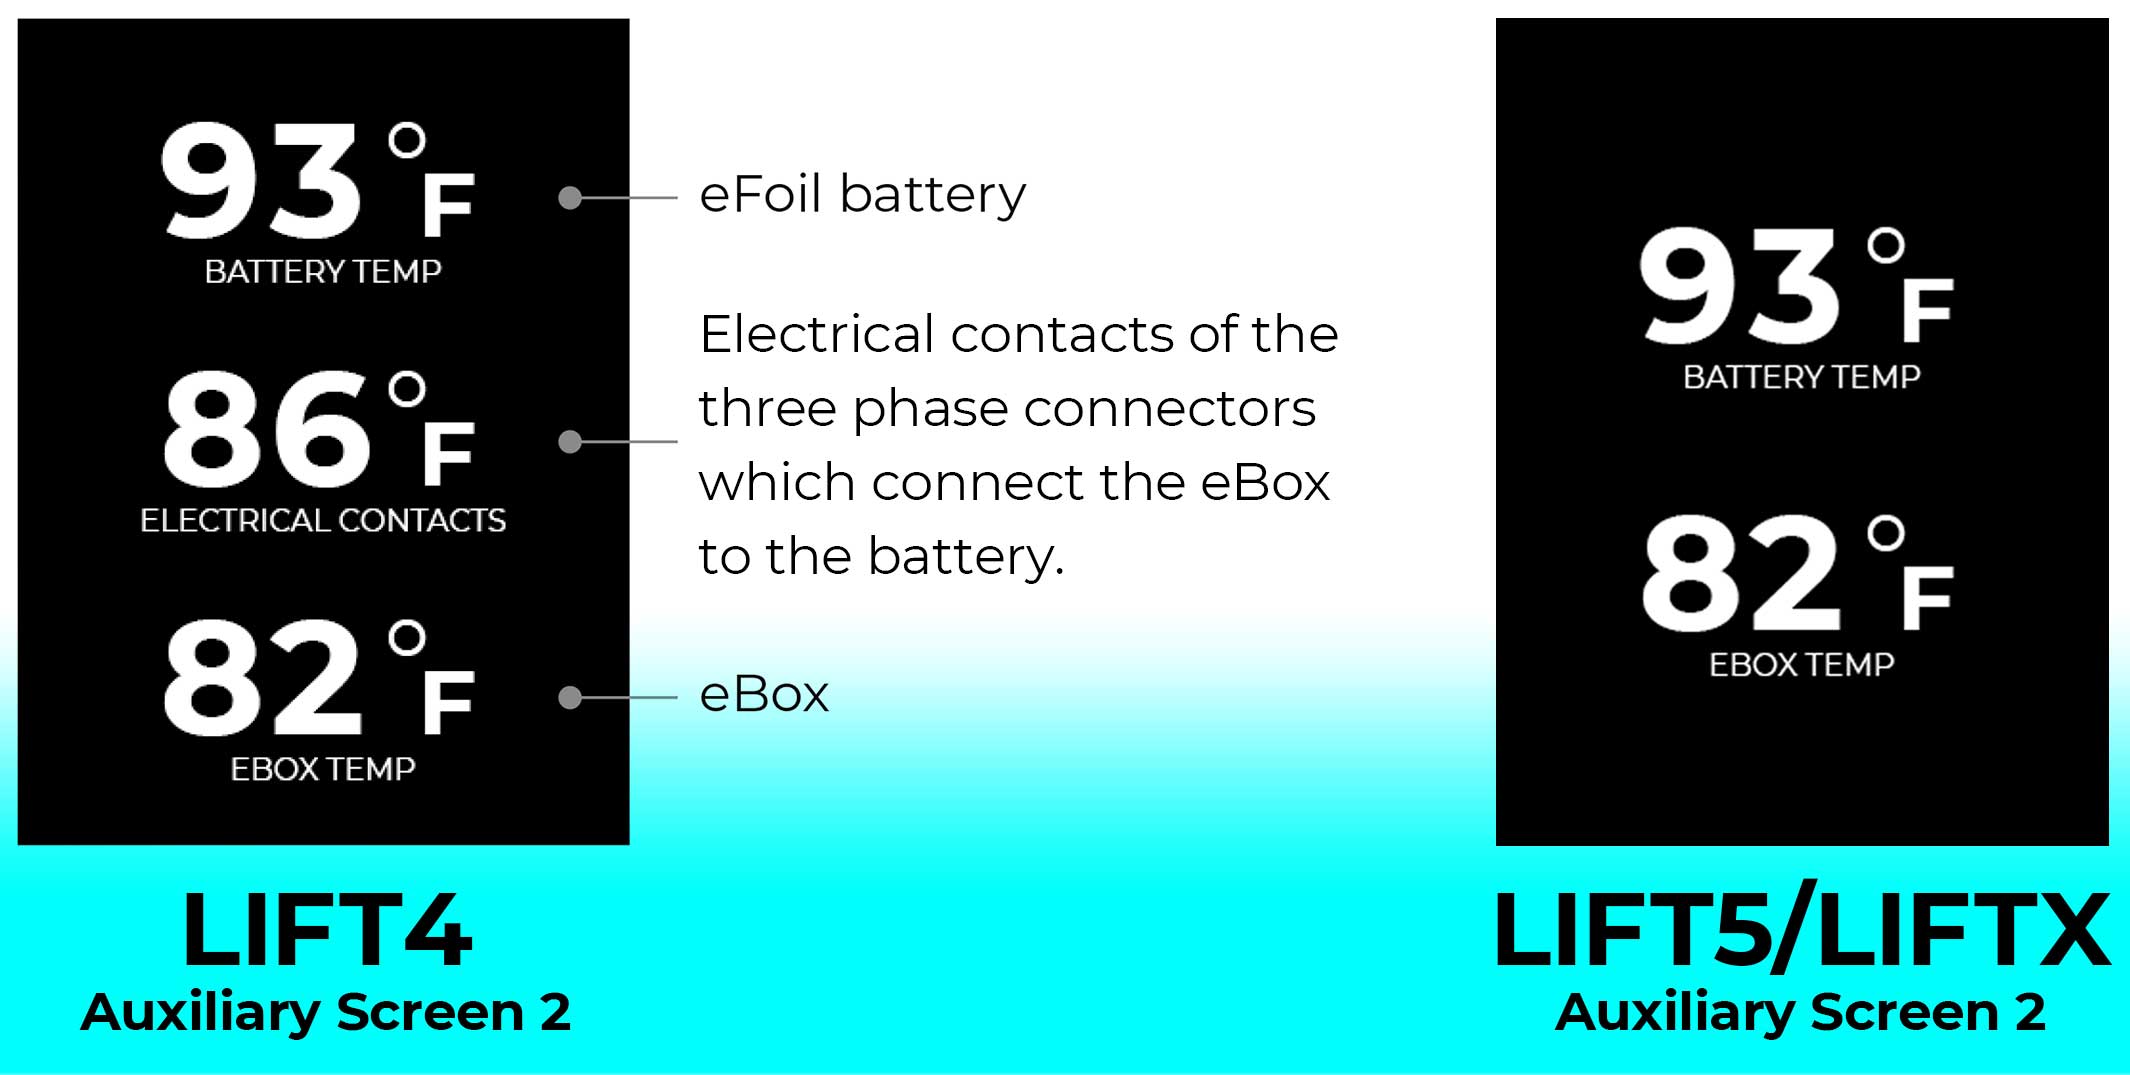
AUXILIARY SCREEN 2
eFoil Component Temperatures: This screen displays the temperatures of several eFoil components. The temperatures will be blank if the hand controller is not connected to a board.
AUXILIARY SCREEN 3
Hand Controller Board Signal Strength: This screen displays the hand controller’s signal strength. The lower the number, the better the signal strength.
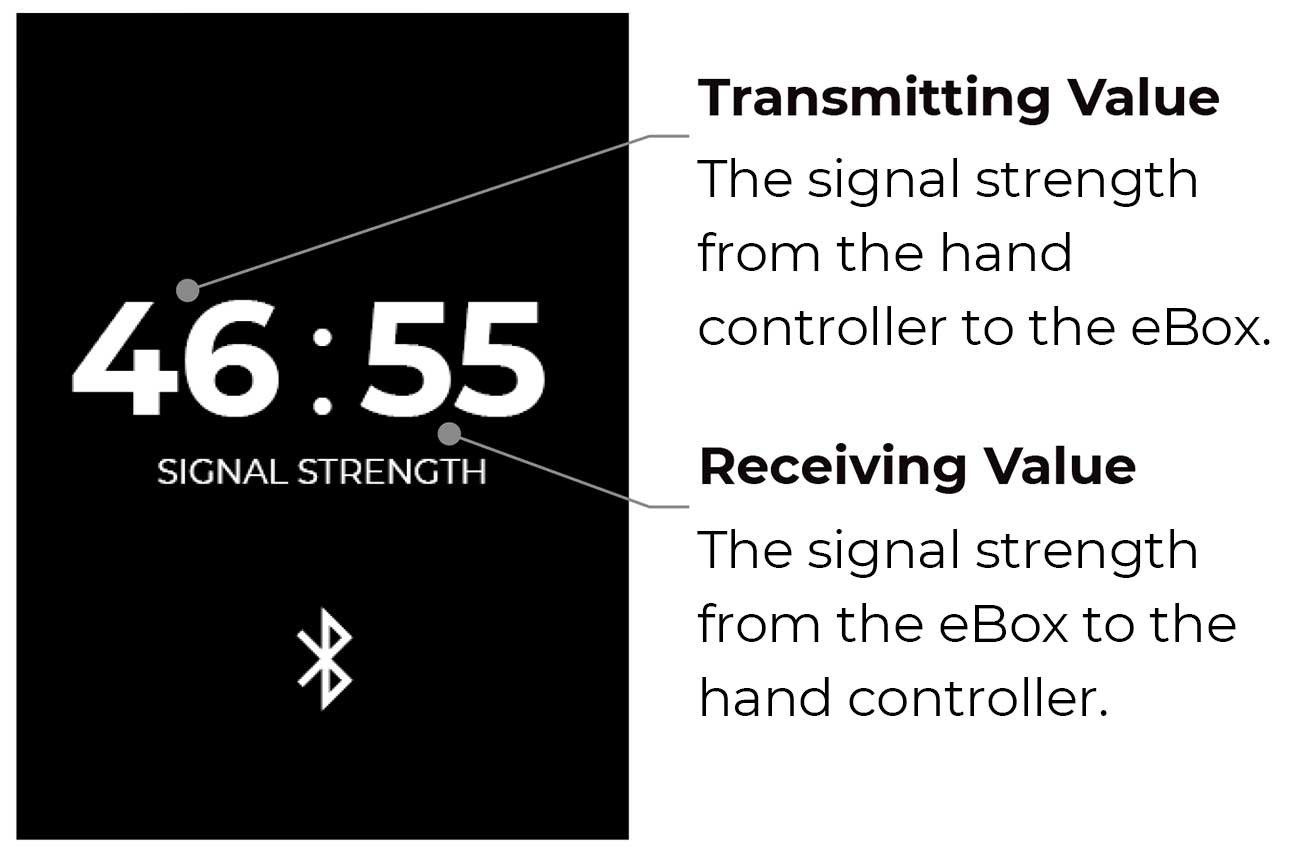
Please contact Lift Technical Support if you have questions specific to signal strength.
SETTINGS
Board Pairing
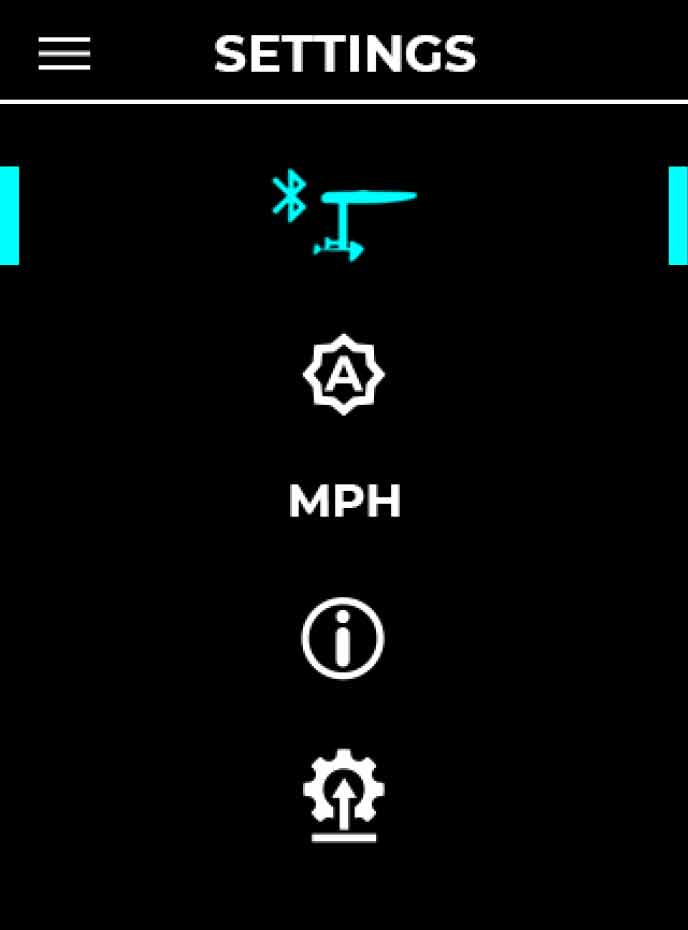
Select to manually begin the pairing process.
Screen Brightness
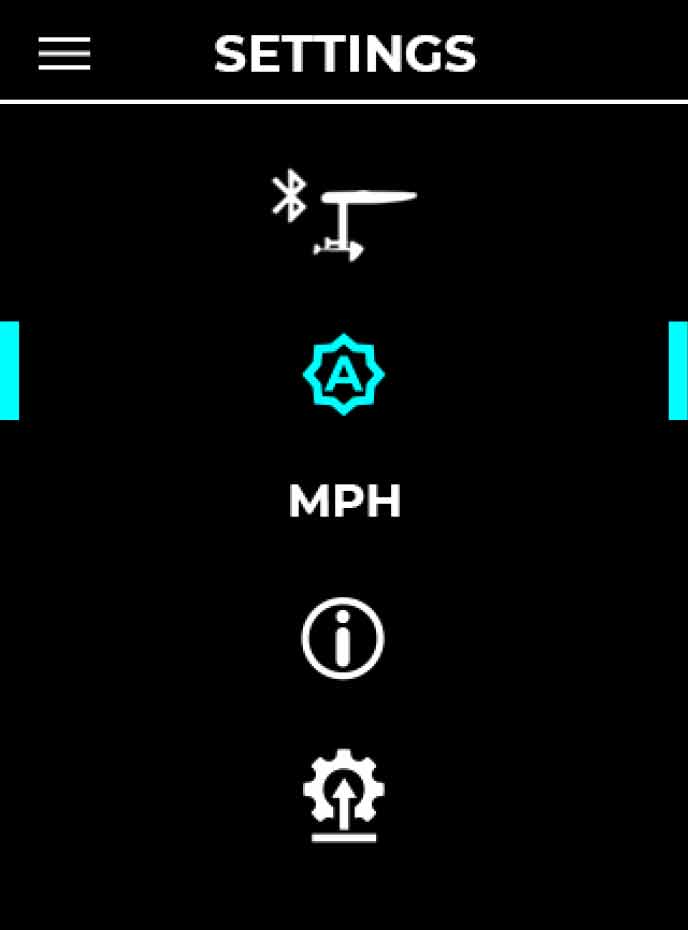
Change the brightness of the LCD backlight. Options include:
- Auto
- Low
- Med
- High
Note: The AUTO setting uses an ambient light sensor to adjust automatically. The LOW setting uses the least battery power.
Change Units
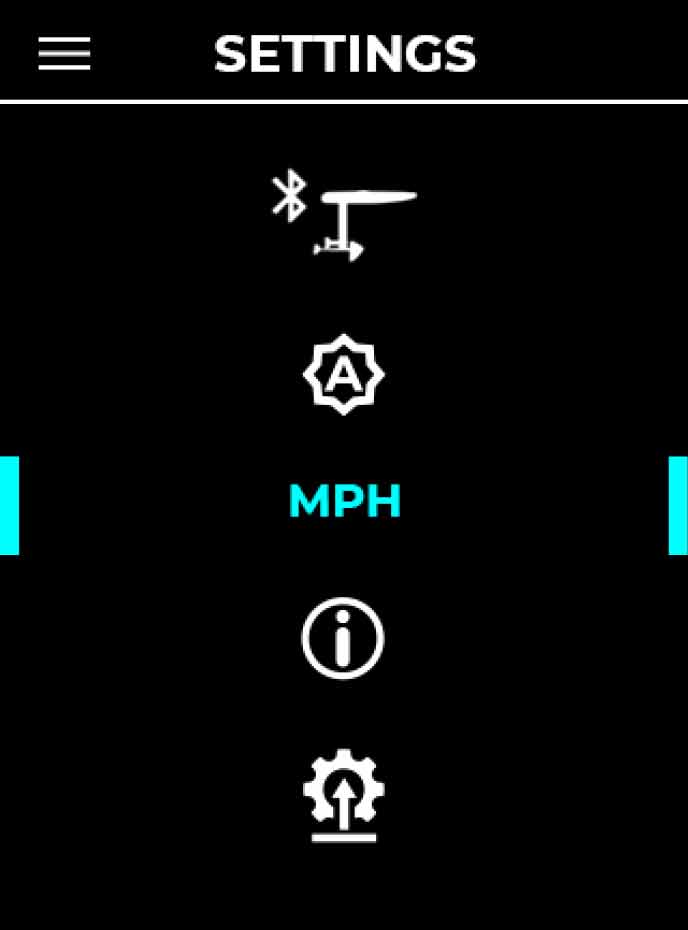
Move between metric and imperial units of measurement.
- Miles, MPH, degrees Fahrenheit
- KM, KM/H, degrees Celsius
Note: Units are set to imperial by default.
About/Info
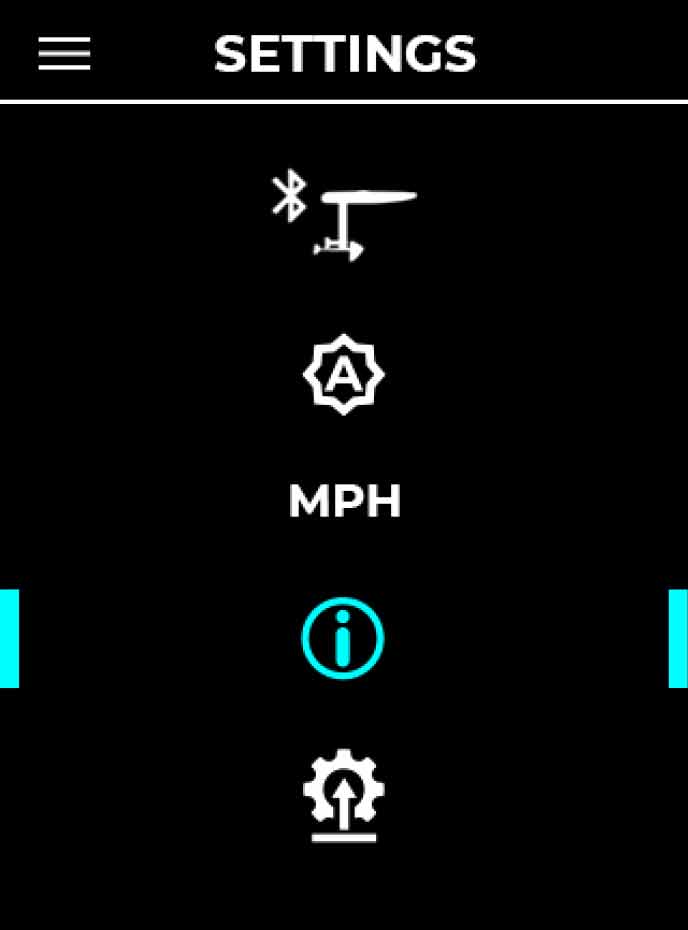
The About/Info screen displays the firmware versions of several eFoil components (when paired). The exact screen shown will depend on which version of EHC you have.
A factory reset can also be performed from this screen. Please see the FACTORY RESET section of this manual for details.
Update Firmware

Update firmware through the Lift Foils App: You must connect the hand controller to the Lift Foils app to update the hand controller firmware. Follow the instructions in the Lift Foils app to connect your gear and update the firmware. Refer to the Updating Firmware section of the user manual for additional details.
SCREEN GUIDE
Your EHC will display two different categories of informational screens: STATUS SCREENS and WARNING SCREENS.
- STATUS SCREENS provide information about your hardware during normal operation and are designed for your general awareness.
- WARNING SCREENS display critical information about issues with your hardware. If any WARNING SCREENS appear, discontinue use of your eFoil and address the issue appropriately, referencing the information listed below each screen in this manual.
STATUS SCREENS
Startup:
Appears when powering on your EHC.
NOTE: The start-up screen displayed will depend on the version of EHC you have. Refer to the screens.
Bluetooth/Attempting to Pair:

Appears when the hand controller is actively searching for an eFoil (to pair with) via Bluetooth.
Follow the instructions in the “Pairing” section of this manual.
Paired:
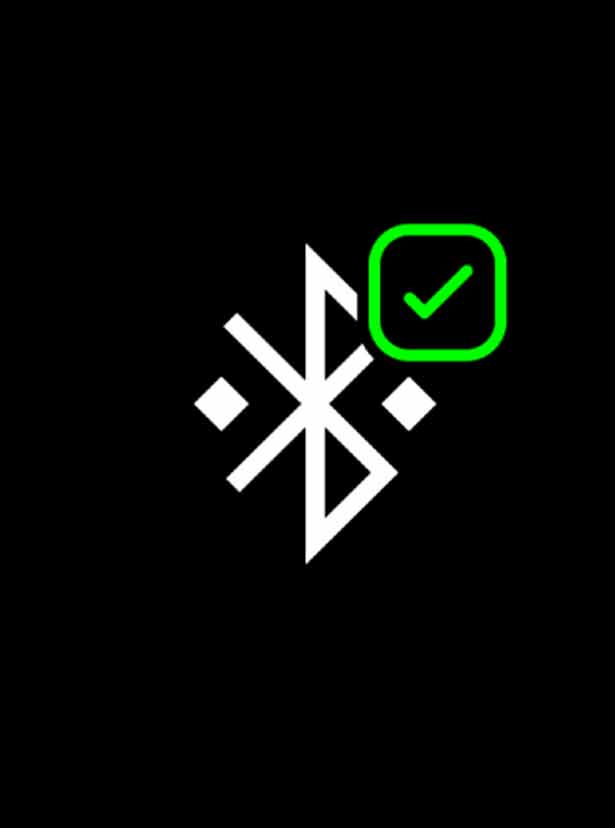
Appears when the hand controller successfully pairs with the eFoil. This screen will trigger after the “Attempting to Pair” screen. Once in pairing mode, the hand controller will attempt to pair with the eFoil for 20-30 seconds, with the outcome being either the ‘Paired’ or ‘Unable to Pair’ screen.
Refer to the “Pairing” section of this manual for more information.
CAUTION: Once the hand controller is paired, the hand controller will operate the propeller on the eFoil.
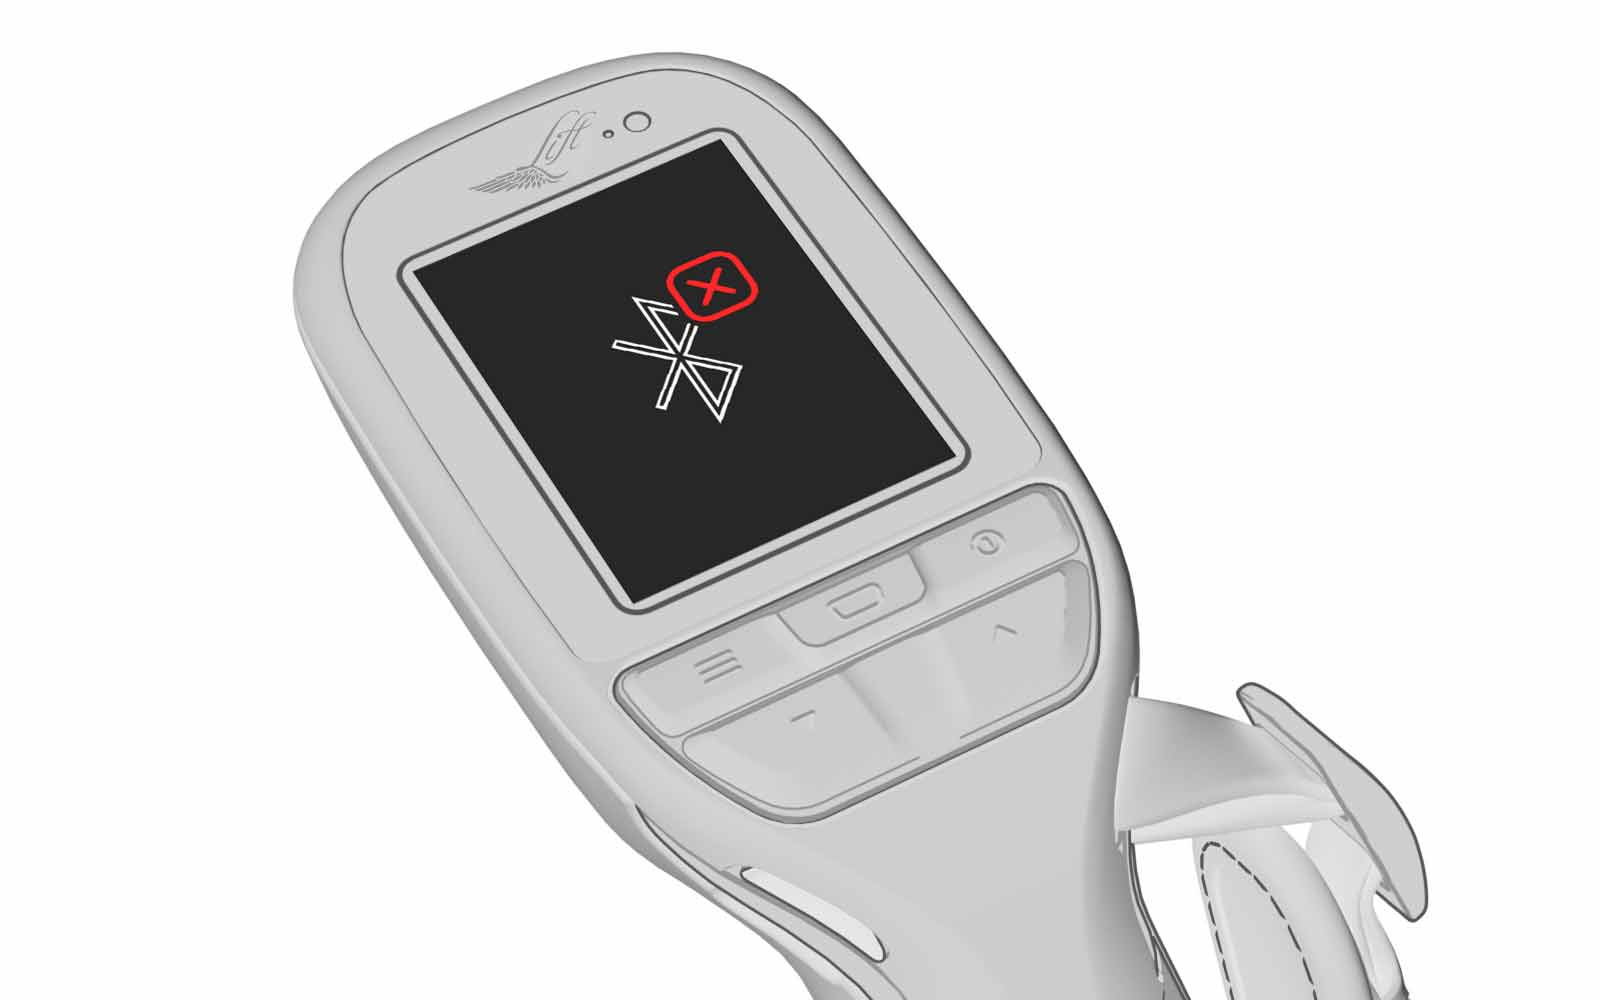
Unable to Pair:
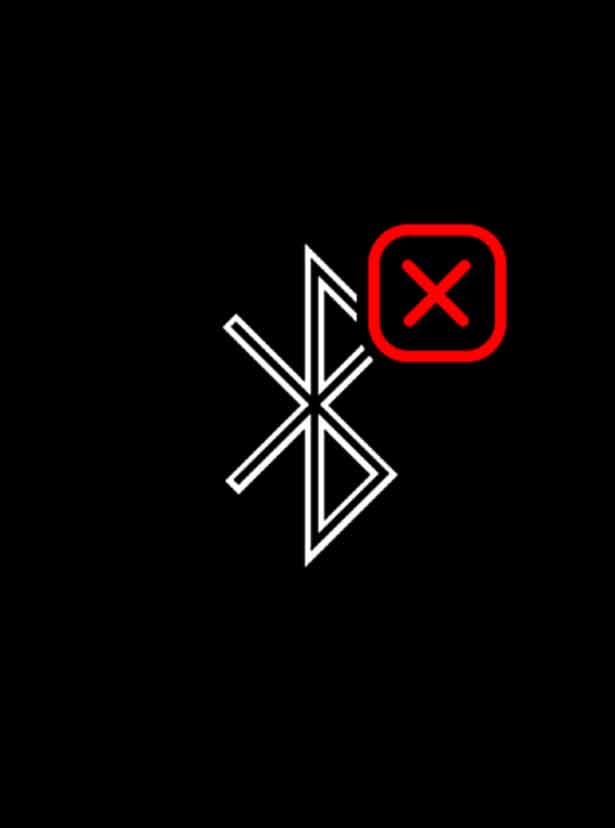
Appears when the pairing process fails. This screen will trigger after the “Attempting to Pair” screen. Once in pairing mode, the hand controller will attempt to pair with the eFoil for 20-30 seconds, with the outcome being either the ‘Paired’ or ‘Unable to Pair’ screen.
Refer to the “Pairing” section of this manual for more information.
Lost Connection:

Appears when the connection between the eFoil and hand controller is weak or has been disconnected.
Move closer to the board or re-pair to reconnect.
Tilt:
Appears when the board reaches a severe angle. When this appears, the motor will be disabled for safety. This means pressing the EHC trigger will not engage the motor/propeller.
To re-enable, the board must be at an upright angle and the trigger cannot be pressed.
eFoil Low Battery:
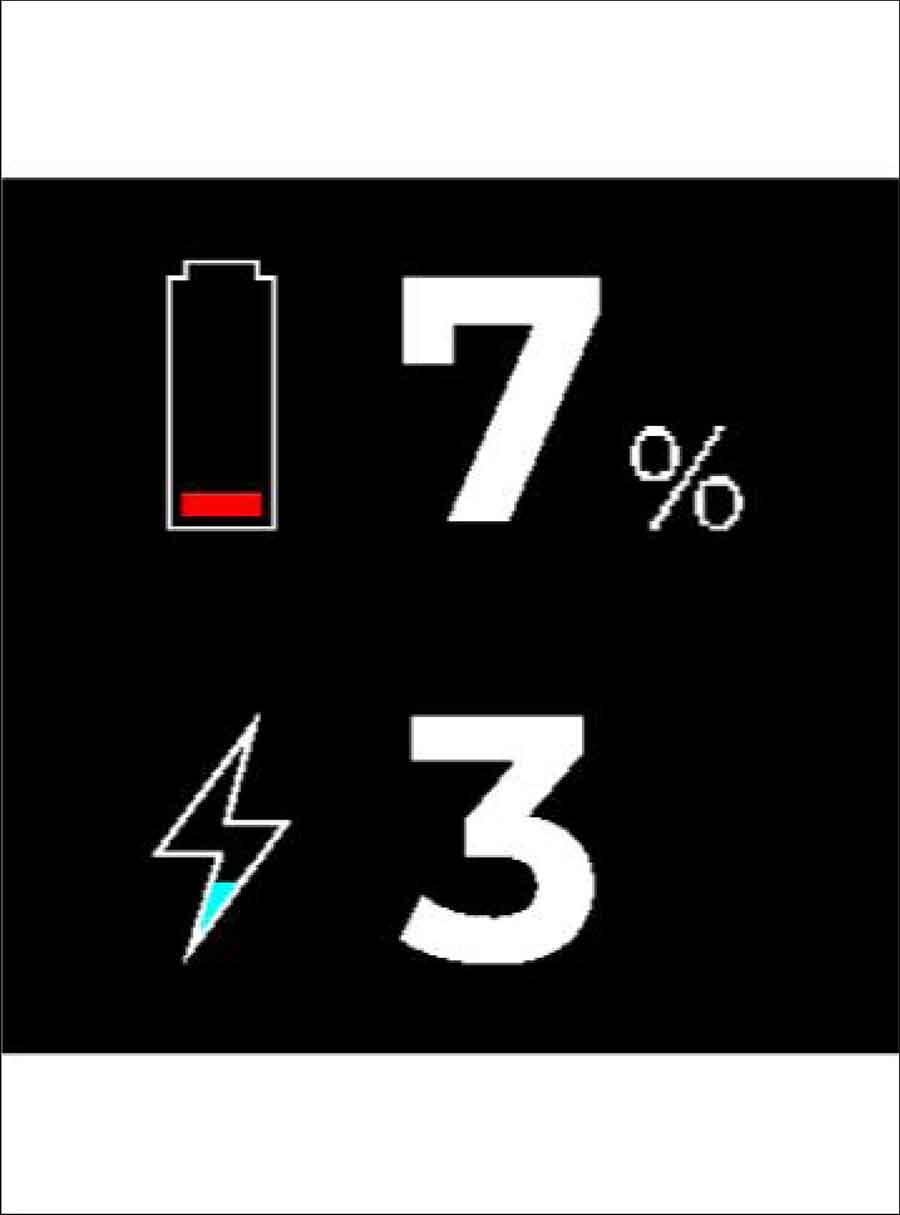
Appears when the eFoil battery is at or below 7% SOC. If you are riding when this screen appears, the battery will automatically enter into its ‘limp mode,’ reducing its power output to preserve the remaining charge. You will feel a noticeable drop in throttle response and power, signaling you to head to shore and recharge.
Make your way to shore promptly and ride conservatively with reduced speed and power.
eFoil Critical Low Battery:
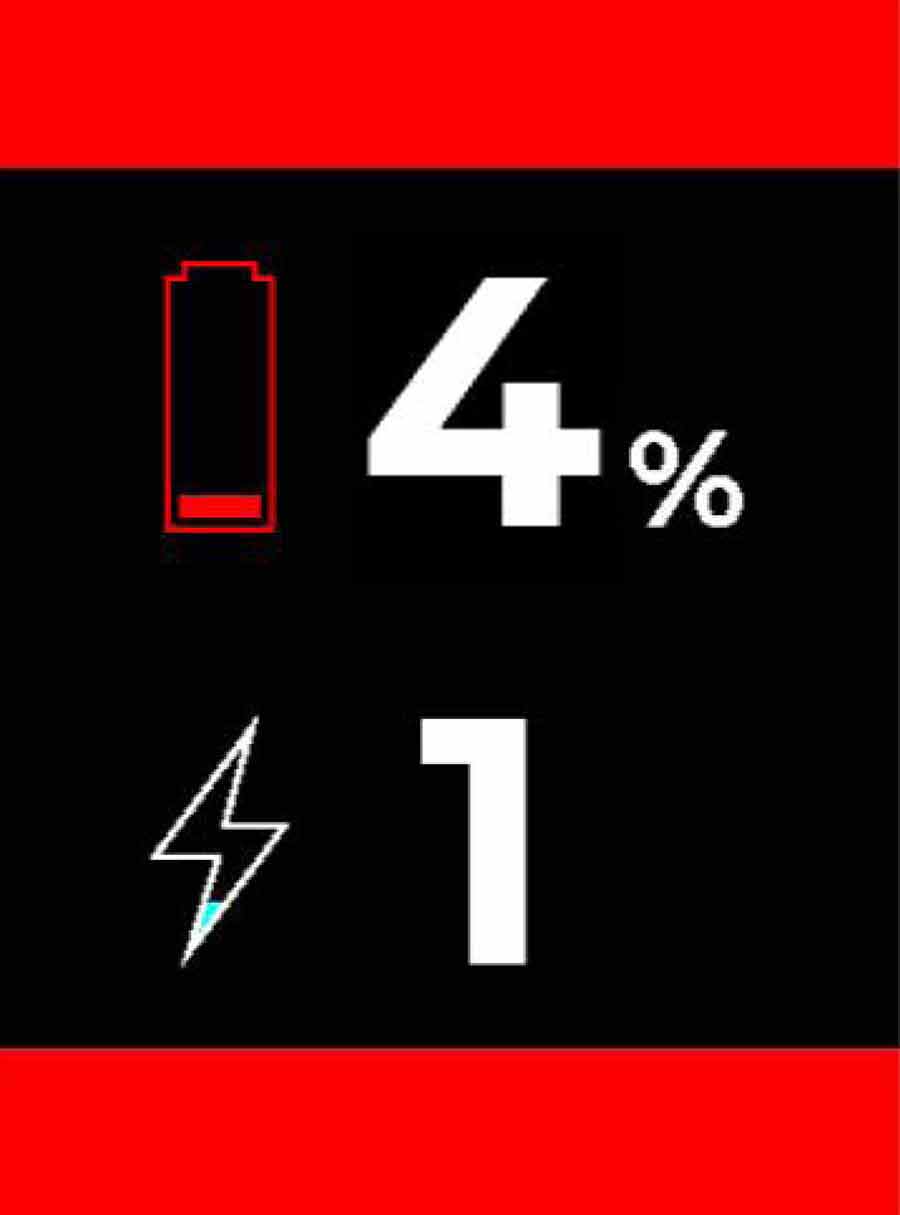
Appears when the eFoil battery is at or below 4% SOC. If you are riding when this screen appears, the battery will automatically transition to the next ‘limp mode,’ further reducing its power output to preserve the remaining charge. The remaining battery power will be very limited. Throttle response and speed will be significantly reduced. This is the final warning.
Immediate return to shore is strongly advised.
NOTE: Failure to return promptly may result in complete shutdown of the eFoil.
Hand Controller Low Battery:
Appears when the hand controller battery is at or below 10% SOC.
Return to shore and recharge the hand controller.
Updating Firmware:

Appears when the firmware is updating. Do not power down the hand controller if the propeller icon is spinning, or the update may fail.
WARNING SCREENS
eFoil Battery Over Temperature:
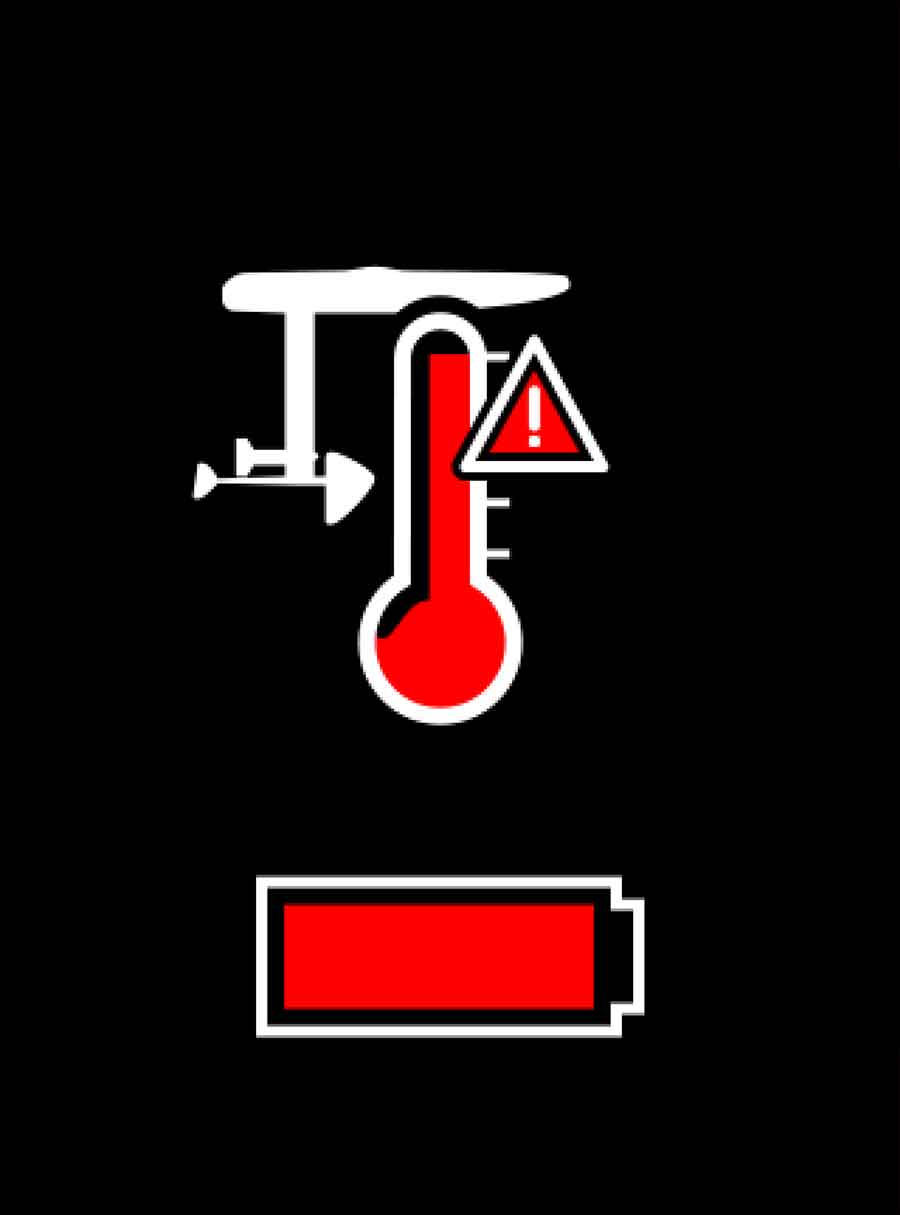
Appears when the eFoil battery is too hot. If you are riding at a high speed when this screen appears, it will slowly reduce to zero.
Reduce power and return to shore. Move the eFoil battery to a cooler environment.
eBox Over Temperature:
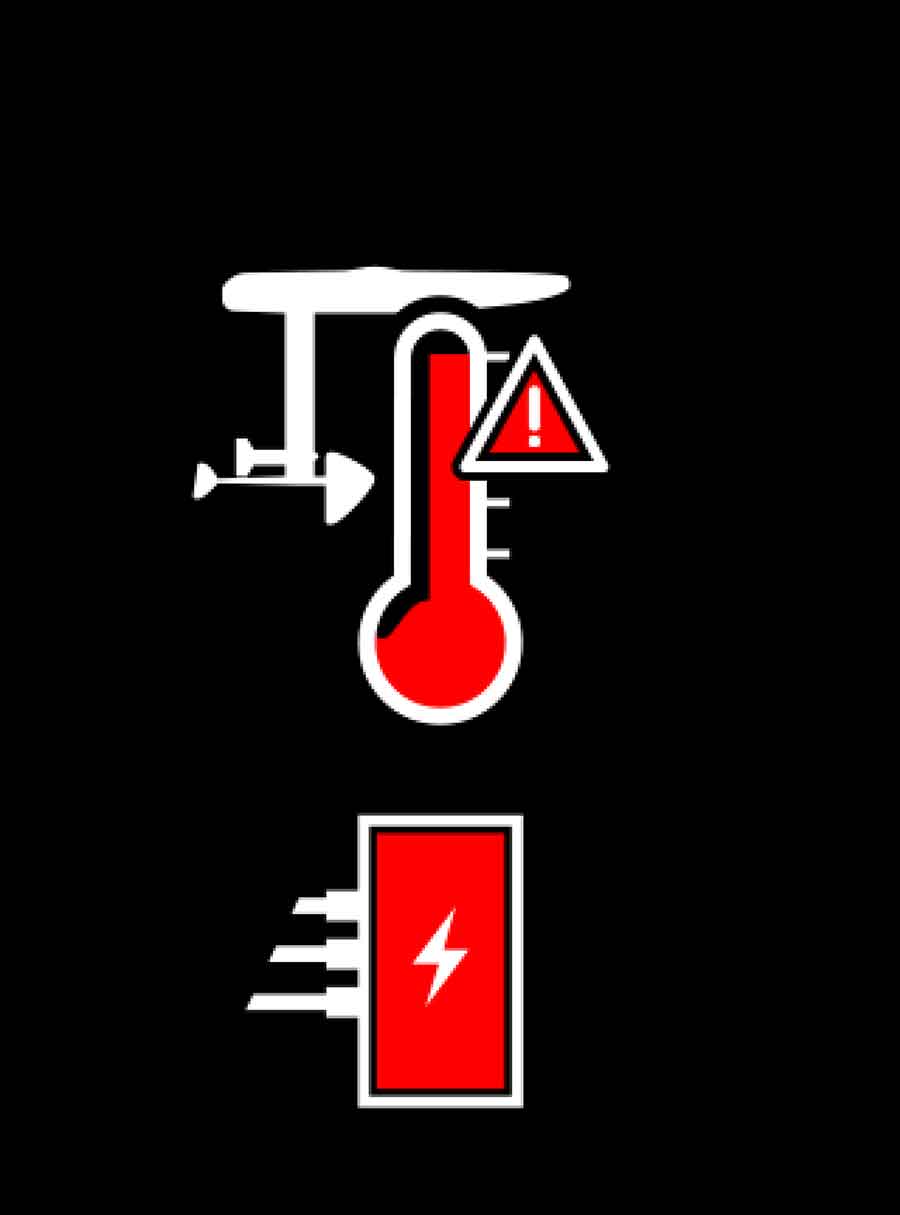
Appears when the eBox is too hot. If you are riding at a high speed when this screen appears, the eFoil will slowly reduce speed to zero.
Return to shore. Ensure the water lines are properly connected.
Electrical Contacts Over Temperature:
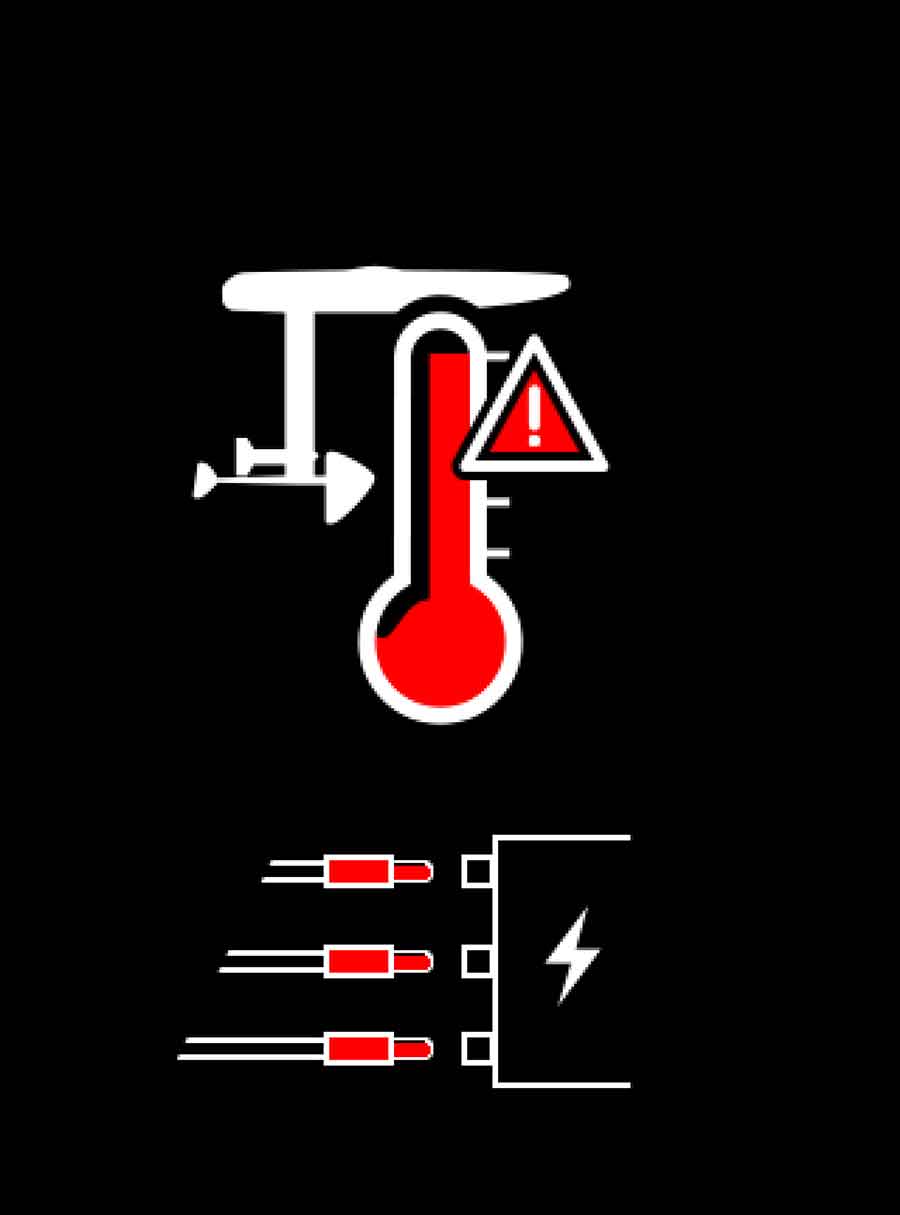
Appears when the plugs are too hot. The trigger will not engage the motor until this is addressed.
Return to shore. Ensure all plugs are fully seated/installed inside the hatch compartment.
NOTE: This warning screen is only applicable to the LIFT4 and previous generation eFoils.
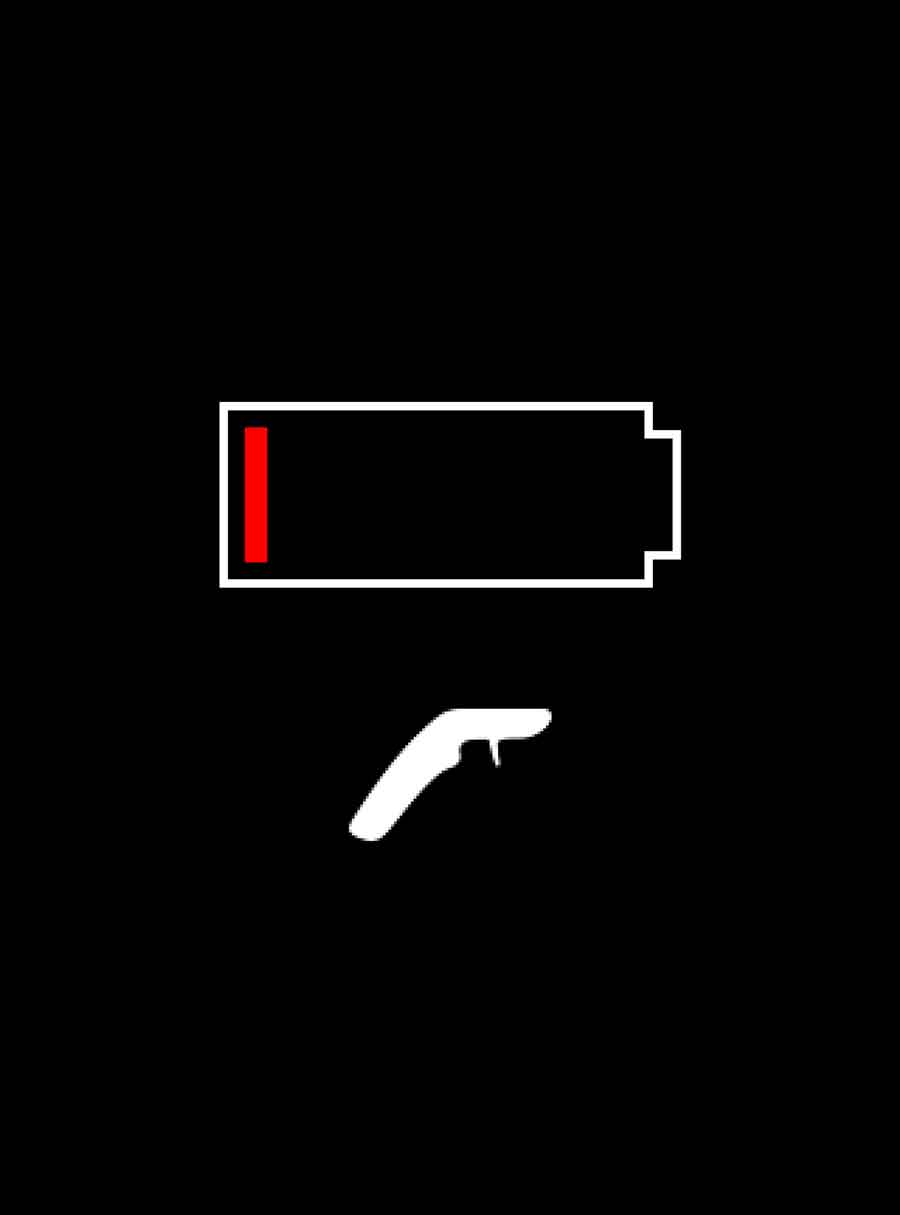
Over Current:
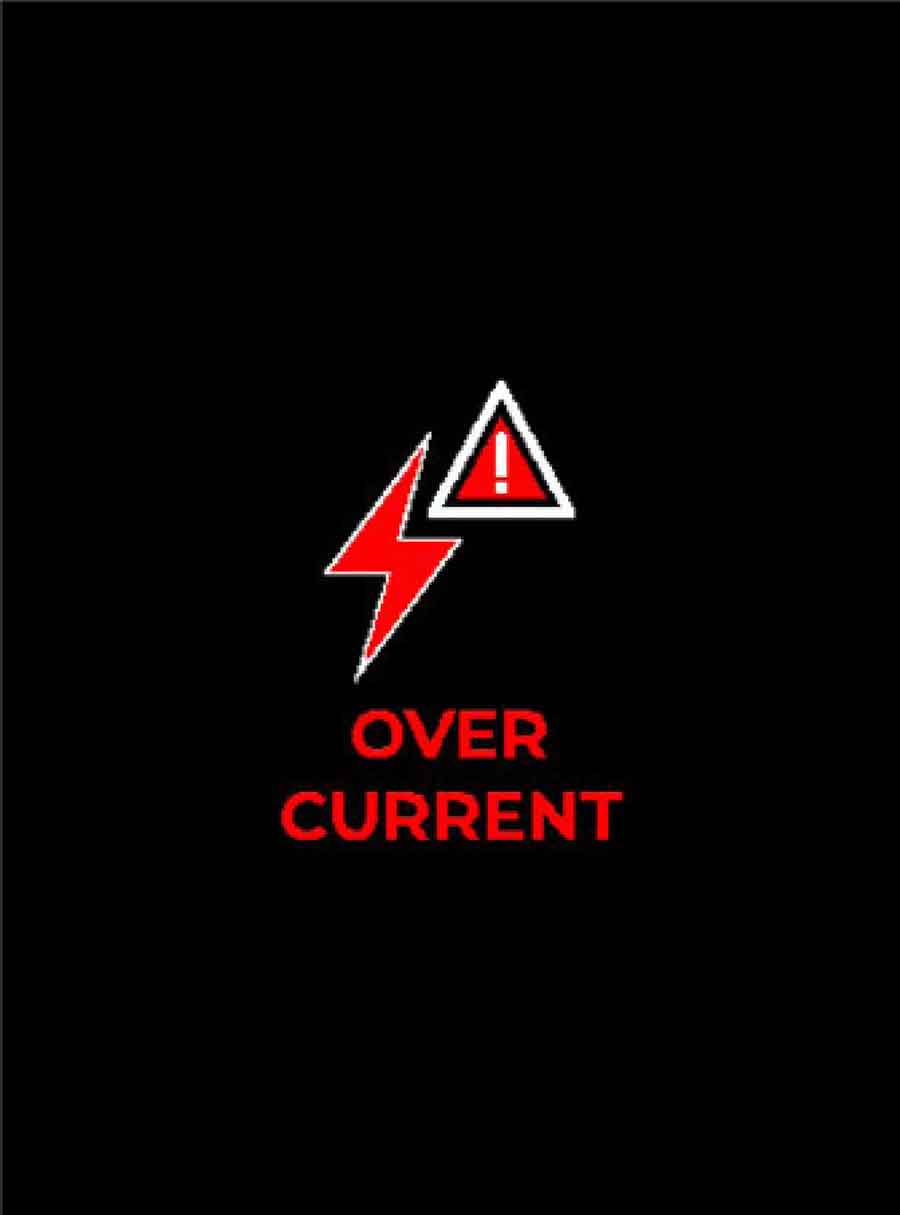
Appears when there is too much current being drawn from the eFoil battery. The eFoil will be disabled until you return to a lower power draw on the battery.
Release the hand controller trigger to reset the eFoil board to zero speed.
Trigger Sensor:
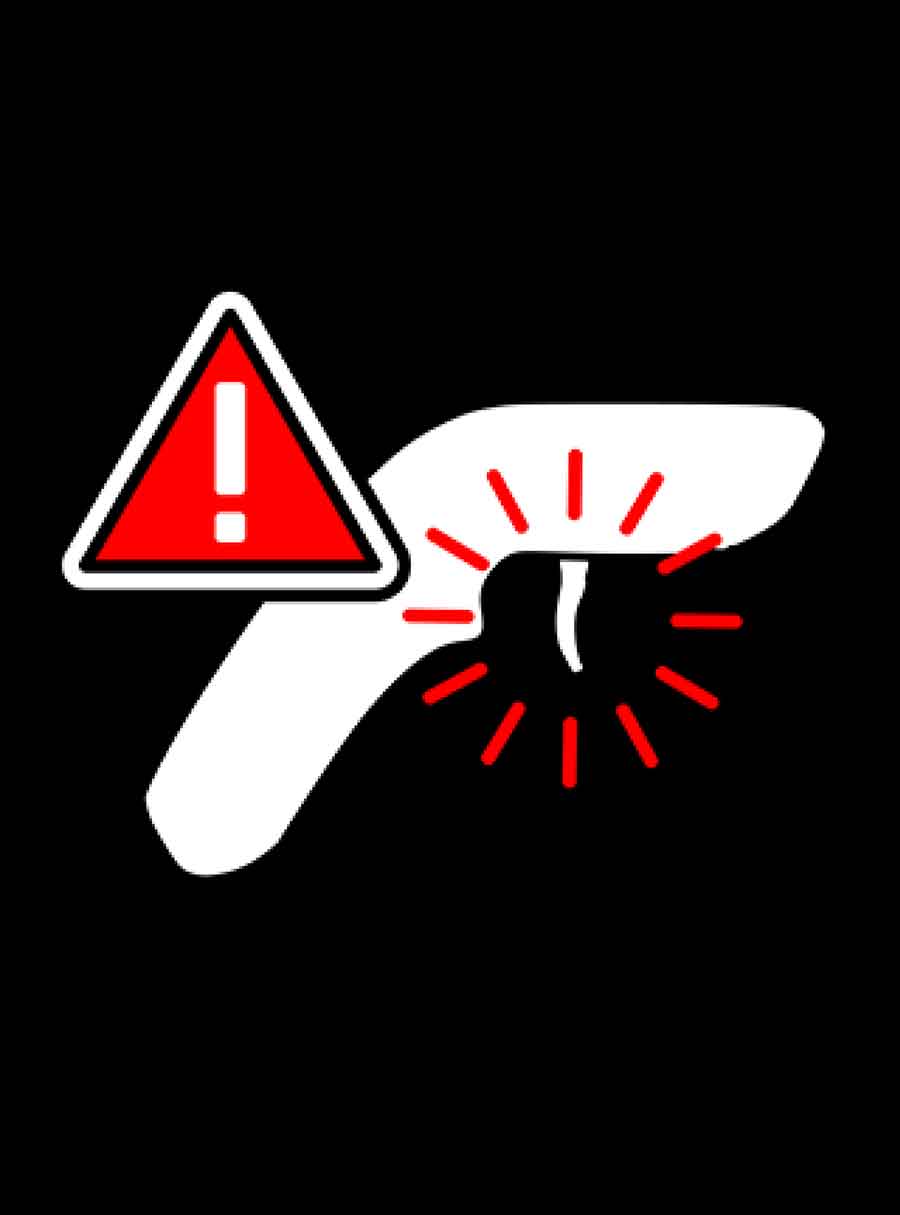
Appears when the trigger is detected to be in an abnormal position. When this appears, the motor will be disabled for safety.
The trigger must be in its neutral position at start up before engaging the motor.
FACTORY RESET
To reset all settings to default, navigate to the About screen and select the Reset Icon, shown highlighted in blue below:
NOTE: Make sure the firmware on your EHC is up to date before performing a factory reset.
Confirm the factory reset by selecting Yes.
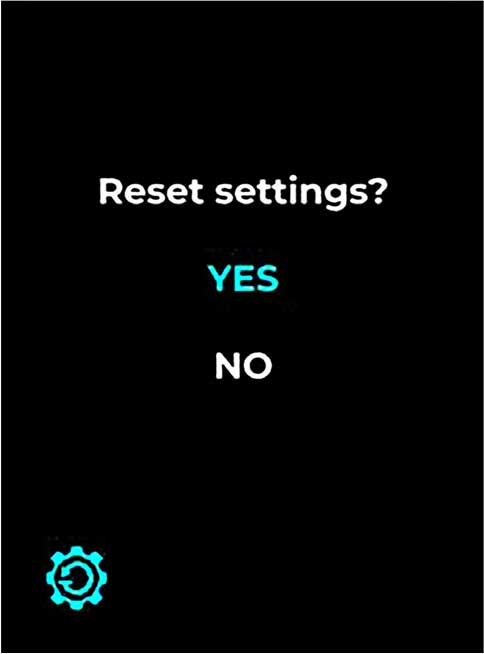
The hand controller will power down. Once turned on, it will enter into auto-pair mode.
STORAGE & MAINTENANCE
When you are finished eFoiling, always turn off the hand controller before dismounting your board or attempting to take the board out of the water.
RINSE & DRY
- Rinse the hand controller in fresh water after each use.
- Actuate the trigger while continuously flushing with fresh water to remove any saltwater, sand, or grit.
- Thoroughly rinse the charging port contacts, removing saltwater and grit.
- Remove any excess water and dry with a clean towel.
STORE
- When fully dried, place the hand controller in the provided protective case when not in use.
- Store the case in a cool, dry location, keeping it out of direct sunlight whenever possible. UV and excessive heat exposure can cause permanent damage and may void the warranty.
Ideal Storage Temperature Range: 32-86°F (0-30°C)
Acceptable Storage Temperature Range: 14-104°F (-10-40°C)
NOTE: Storing the hand controller outside of the ideal storage temperature range will cause the battery to drain faster.
INSPECT, CLEAN, MAINTAIN
- The electrical contacts and metal components are critical elements to maintain on the hand controller. Scratches, salt water, corrosion, and any other damage to the electrical contacts and metal components can cause rapid degradation and will lead to system failure. To maximize their performance and longevity, they require ongoing maintenance.
- Inspect the charging contacts and metal hardware. Check for moisture buildup or corrosion on all contacts and metal hardware. Corrosion can cause damage to these components, which can lead to equipment malfunctions or failure. If you see corrosion, use an electrical contact cleaner to remove it.
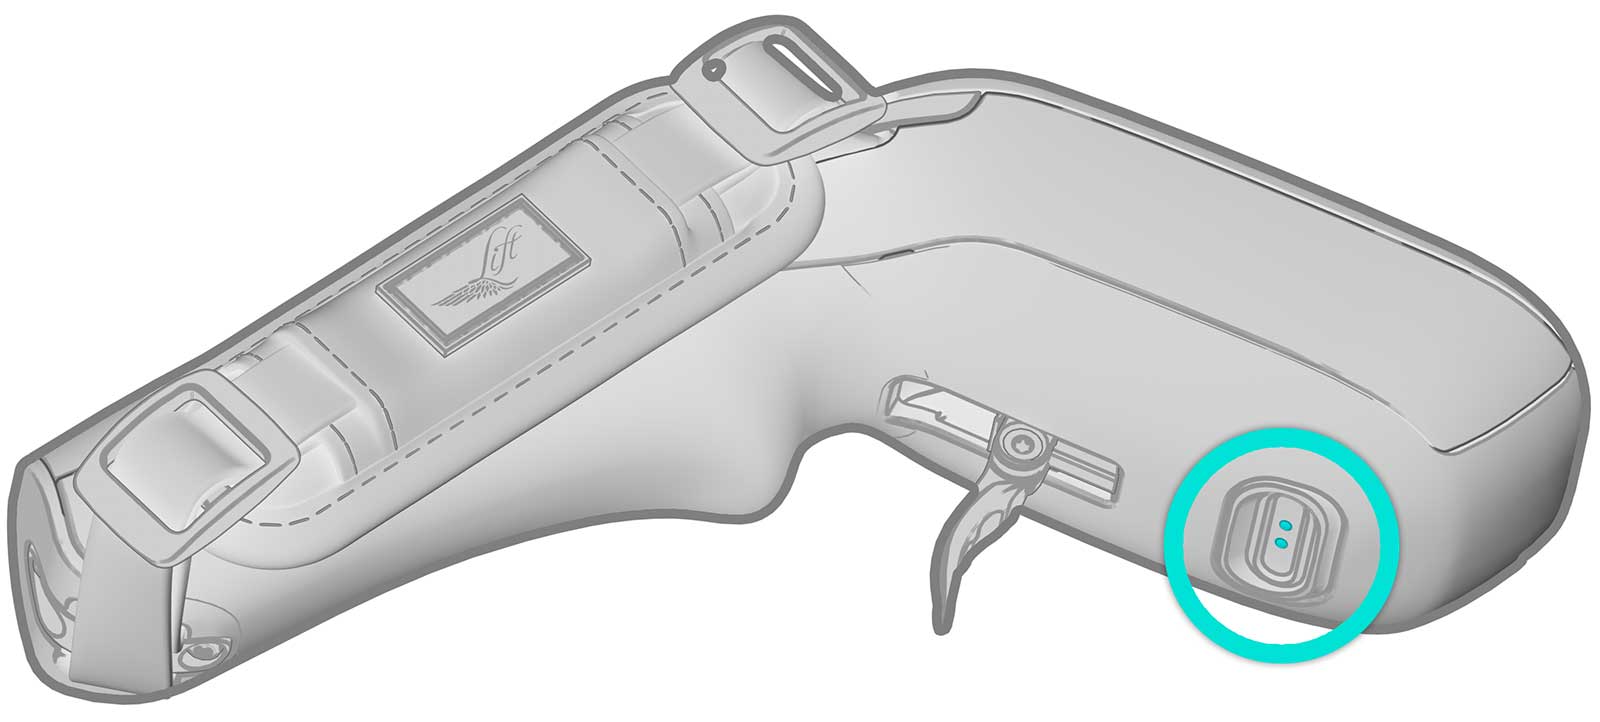
- To prevent corrosion, apply the provided ReelX oil on the charging contacts circled in the image below at least once a month (and more often with frequent use). ReelX is designed to prevent rust and corrosion.
The charging points should be regularly inspected and maintained with ReelX:
TROUBLESHOOTING
For the best experience troubleshooting your gear, please use the Lift Foils App.
CONTACT
When you purchase Lift Foils products, you are investing in a lifetime of customer care, new technology, and new frontiers. If you have questions about your Lift eFoil, accessories, or other gear, please contact us.
For customer support and troubleshooting with your eFoil, use the Lift Foils app.
For further technical support, product questions, or new orders:
- Call: +1 (888) 333-3045
- Email: orders@liftfoils.com